
Building a Blog
TipSince Hugo.Extended has more features than standard Hugo, we will use Hugo.Extended throughout this guide.
Prerequisites
Install VS Code
VS Code is Microsoft’s free and open-source text editor, supporting Windows, macOS, and Linux.
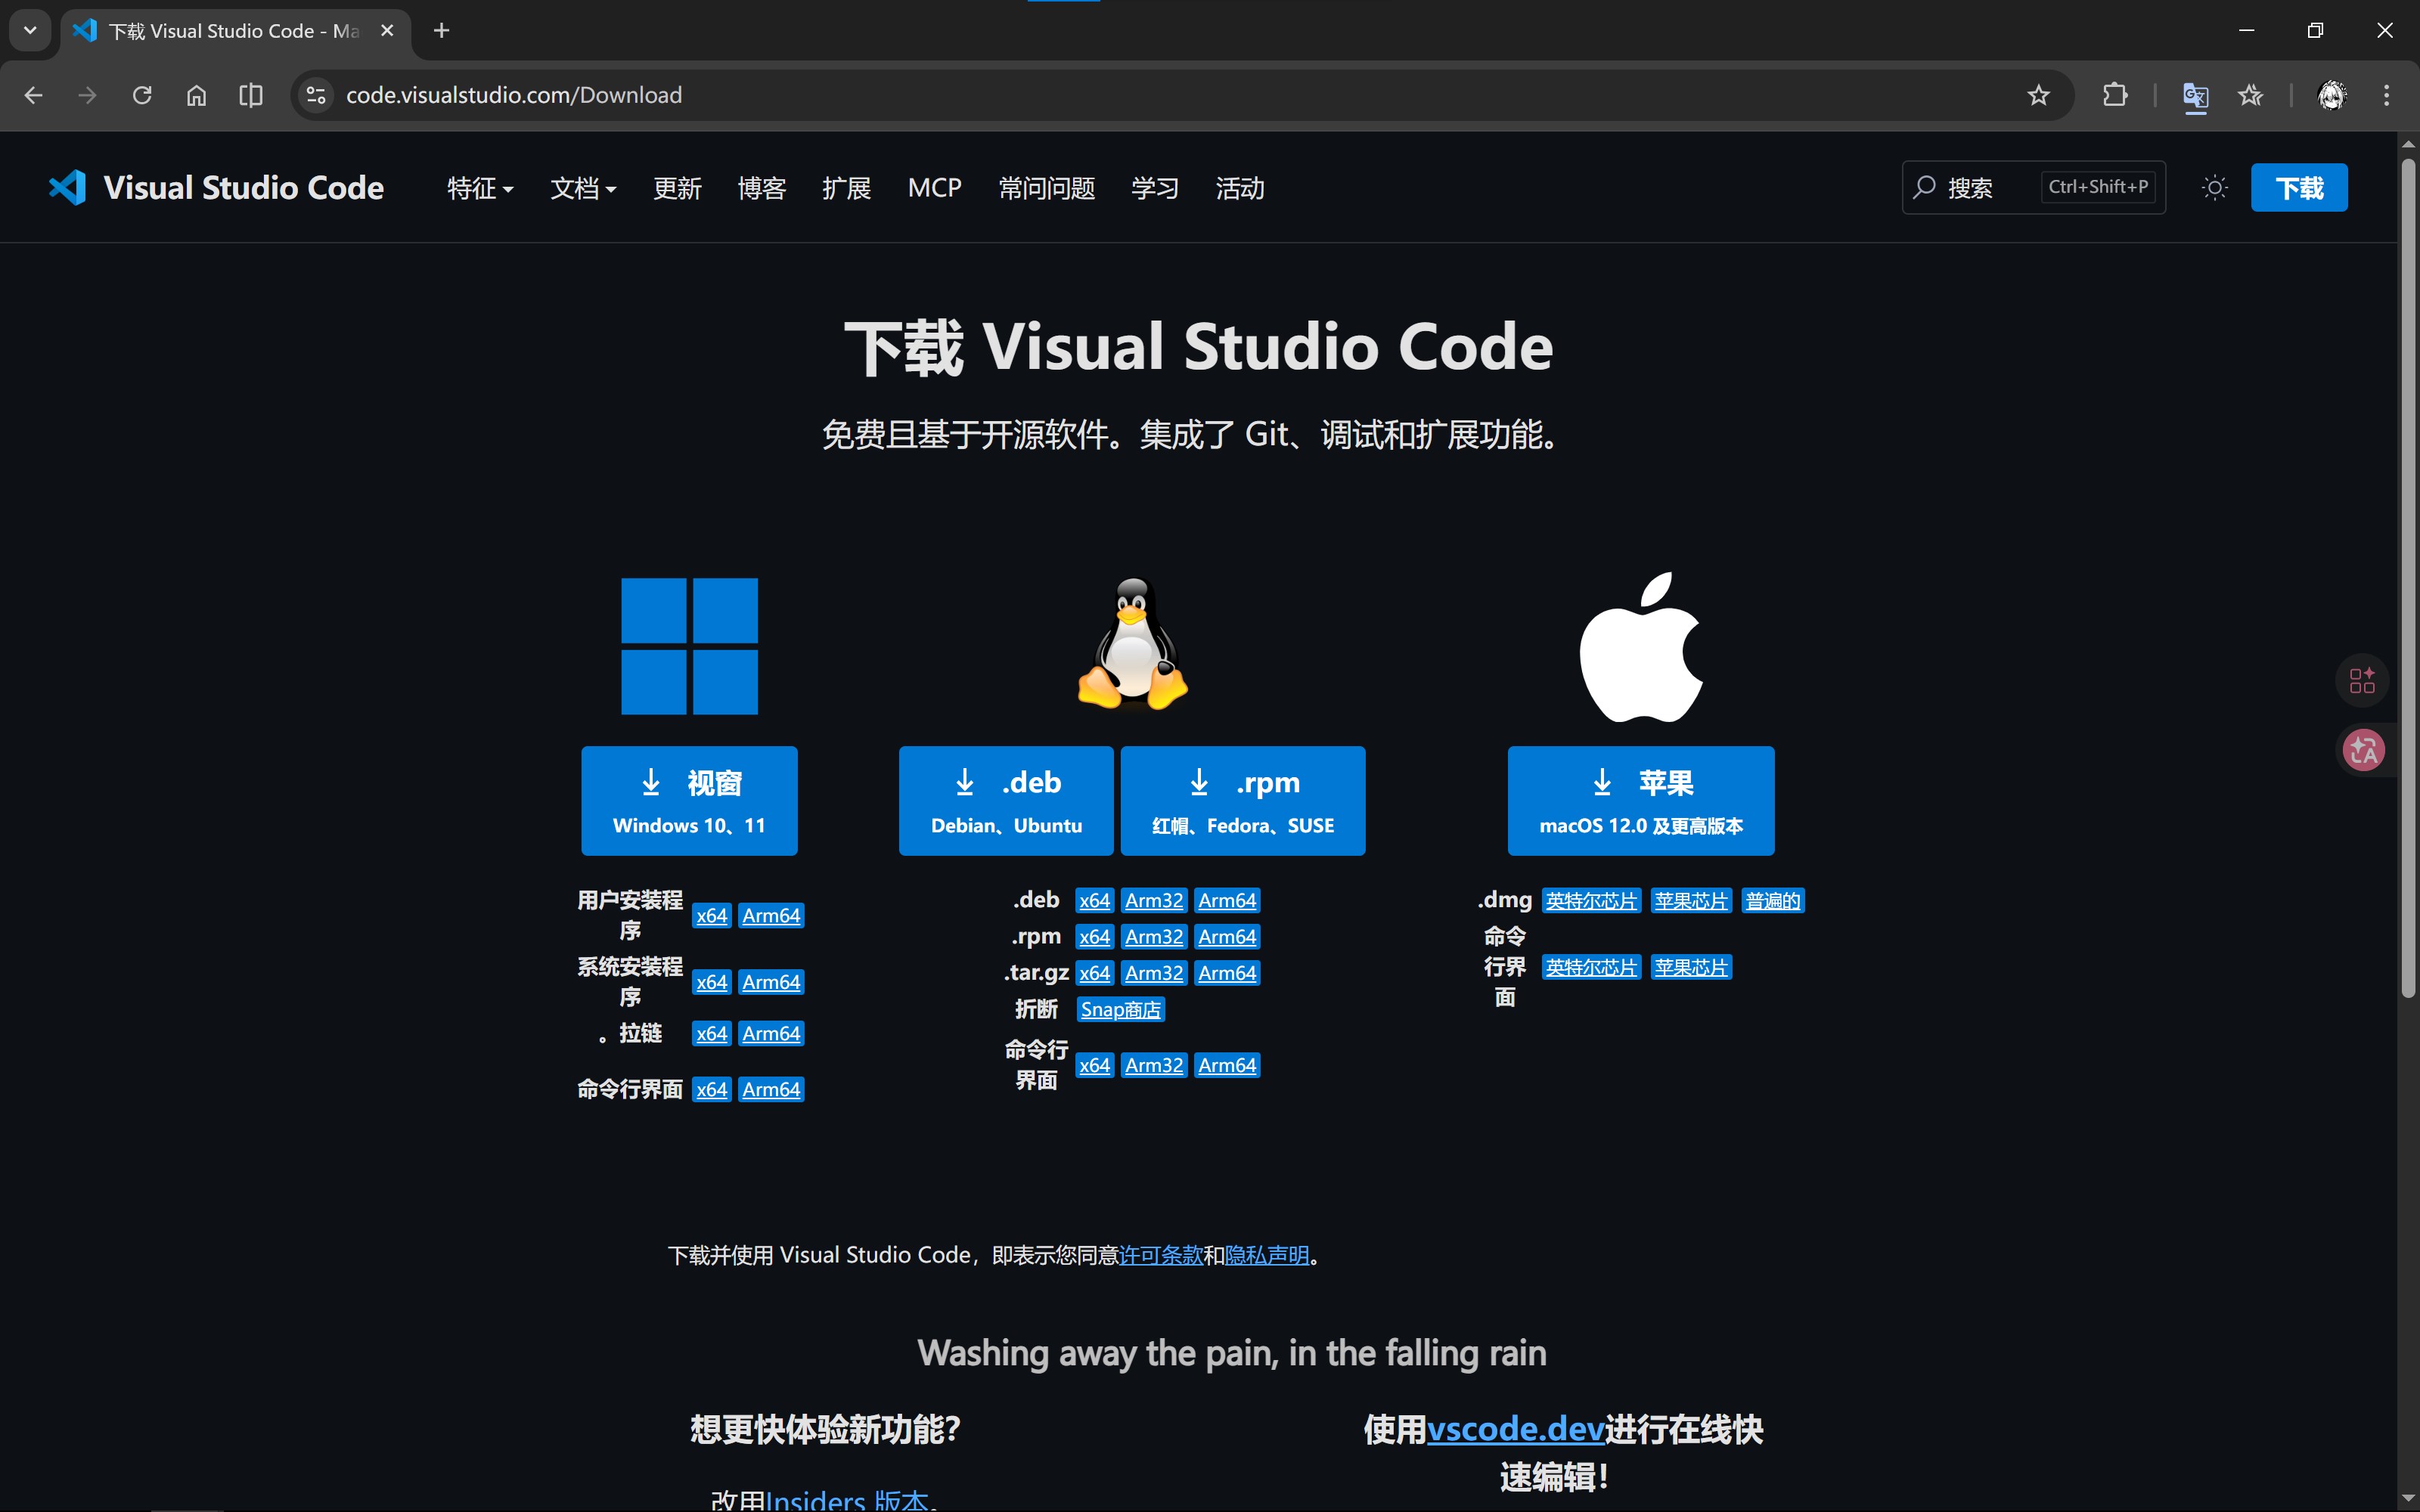
Download and Install VS Code
Open the VS Code download page and choose the appropriate installer for your operating system.
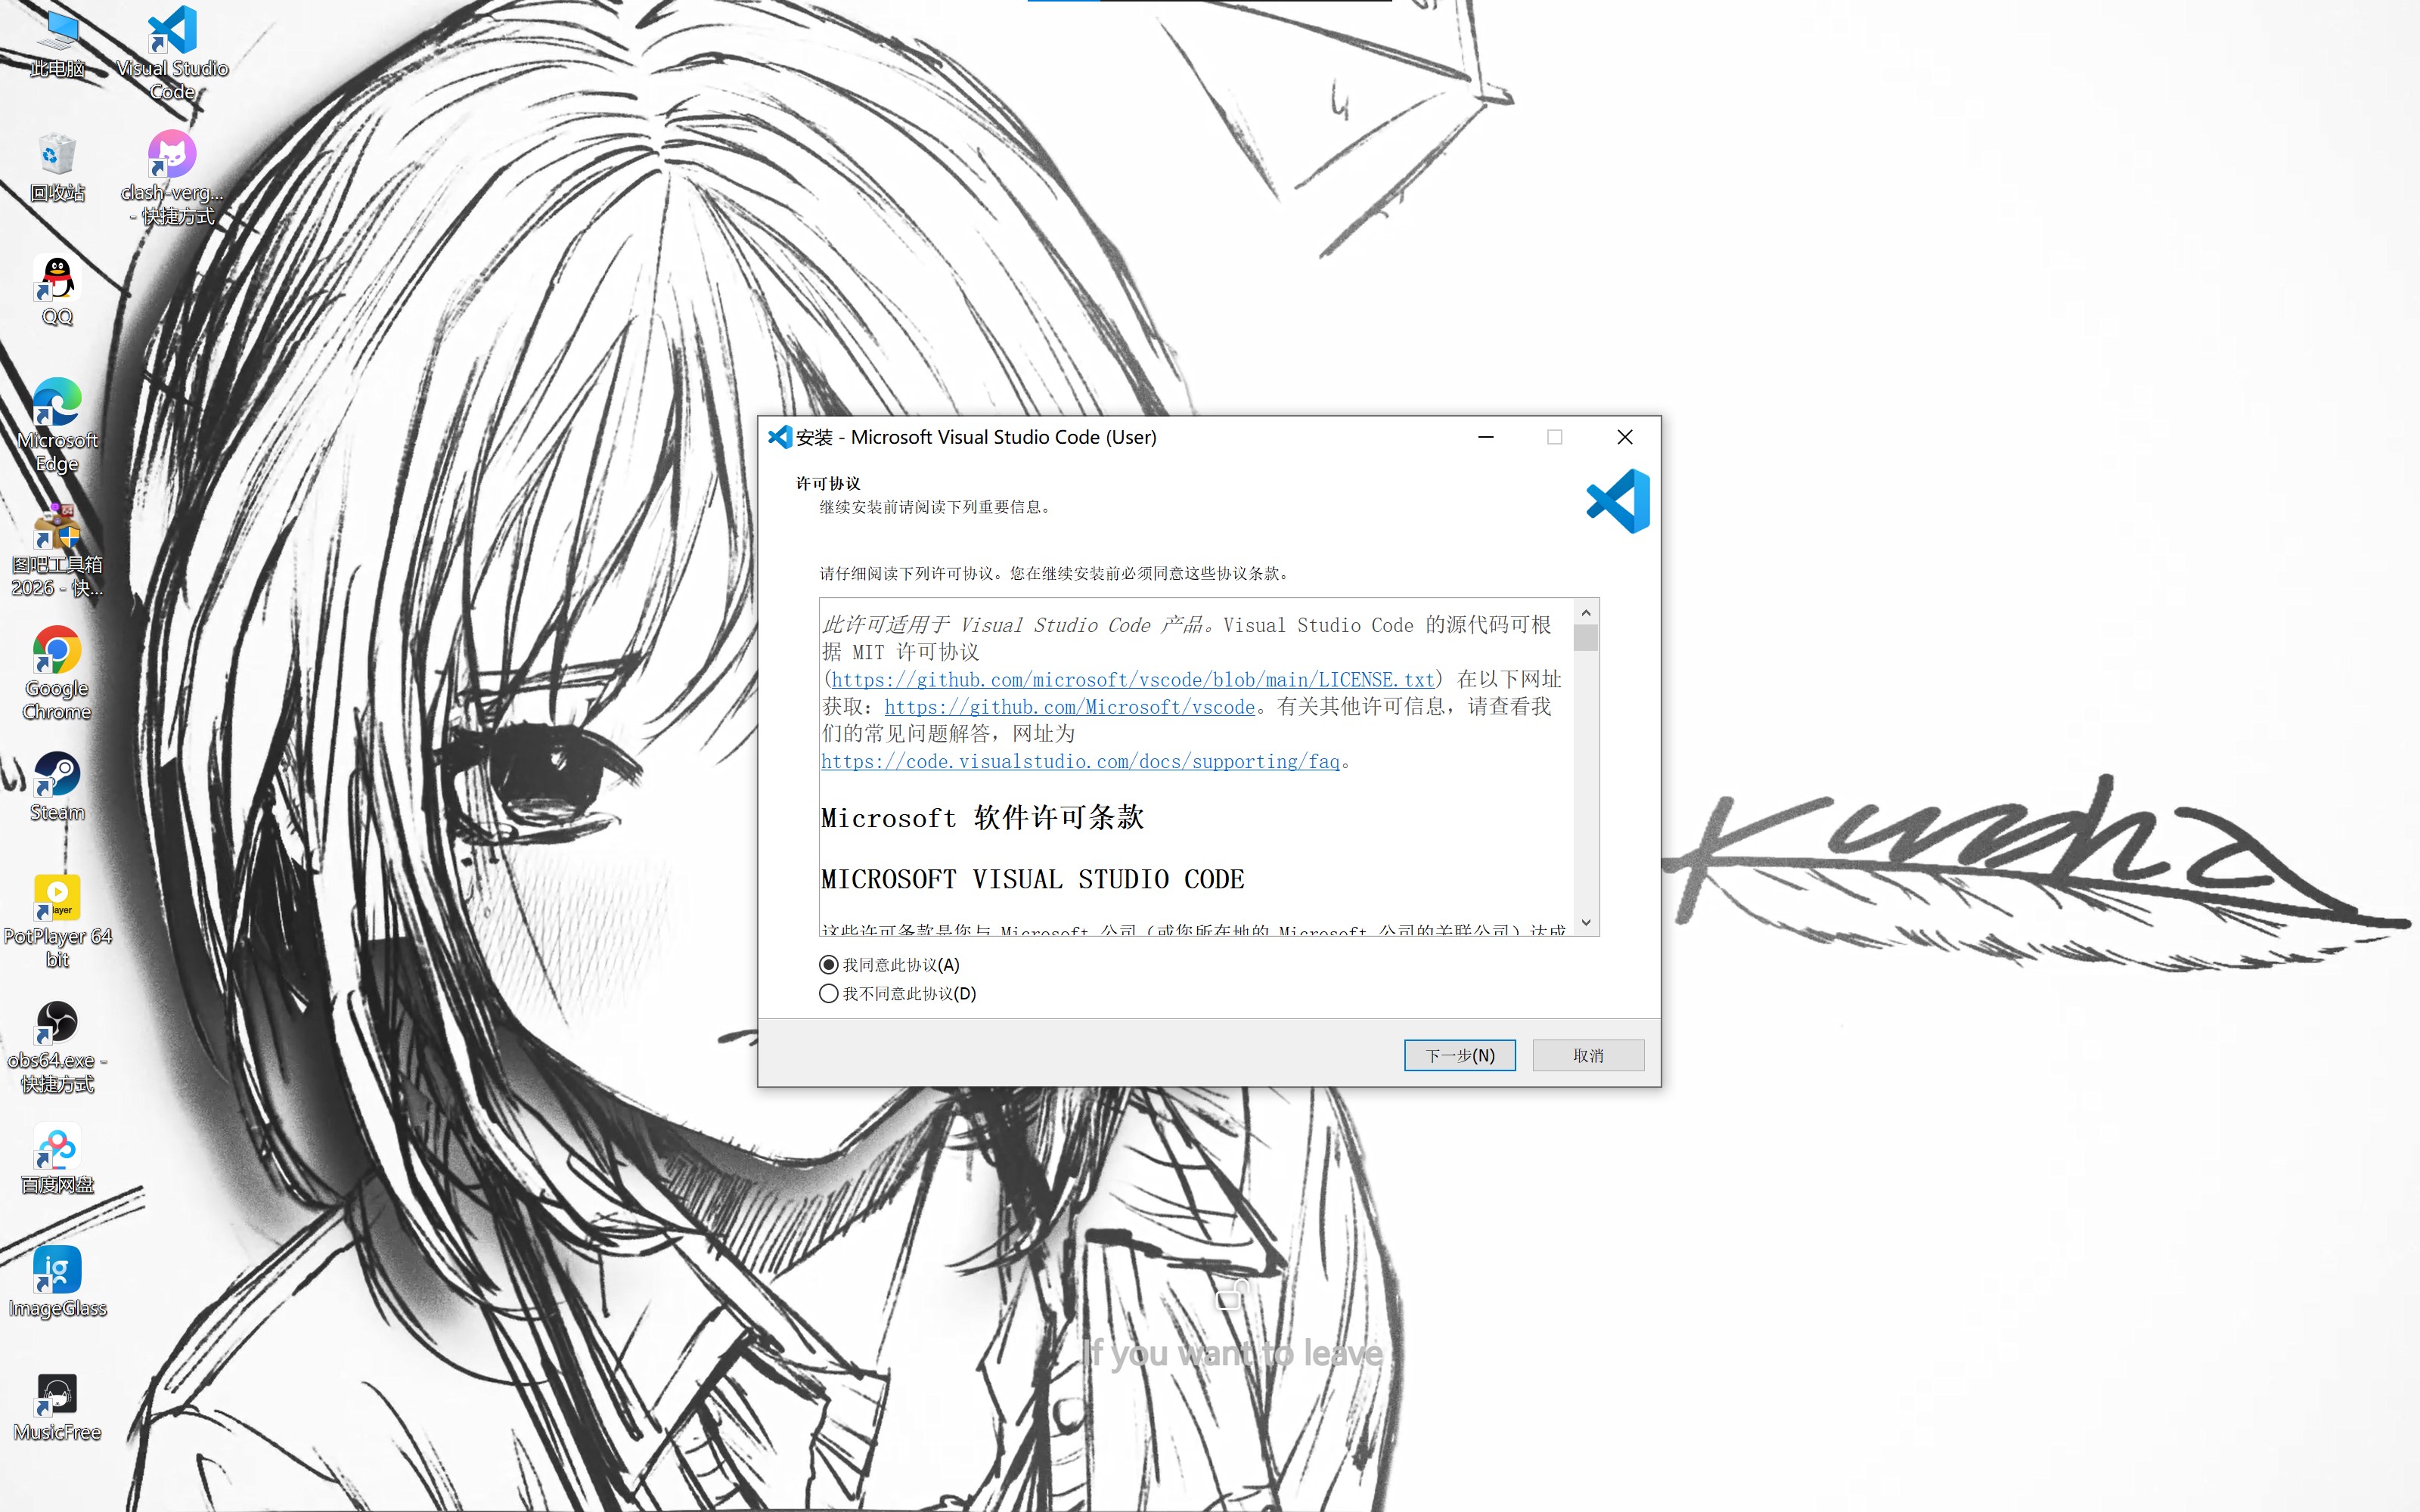
Run the installer and follow the installation prompts.
Configure VS Code
After installation, open Visual Studio Code from the desktop and search for and install the following plugins:
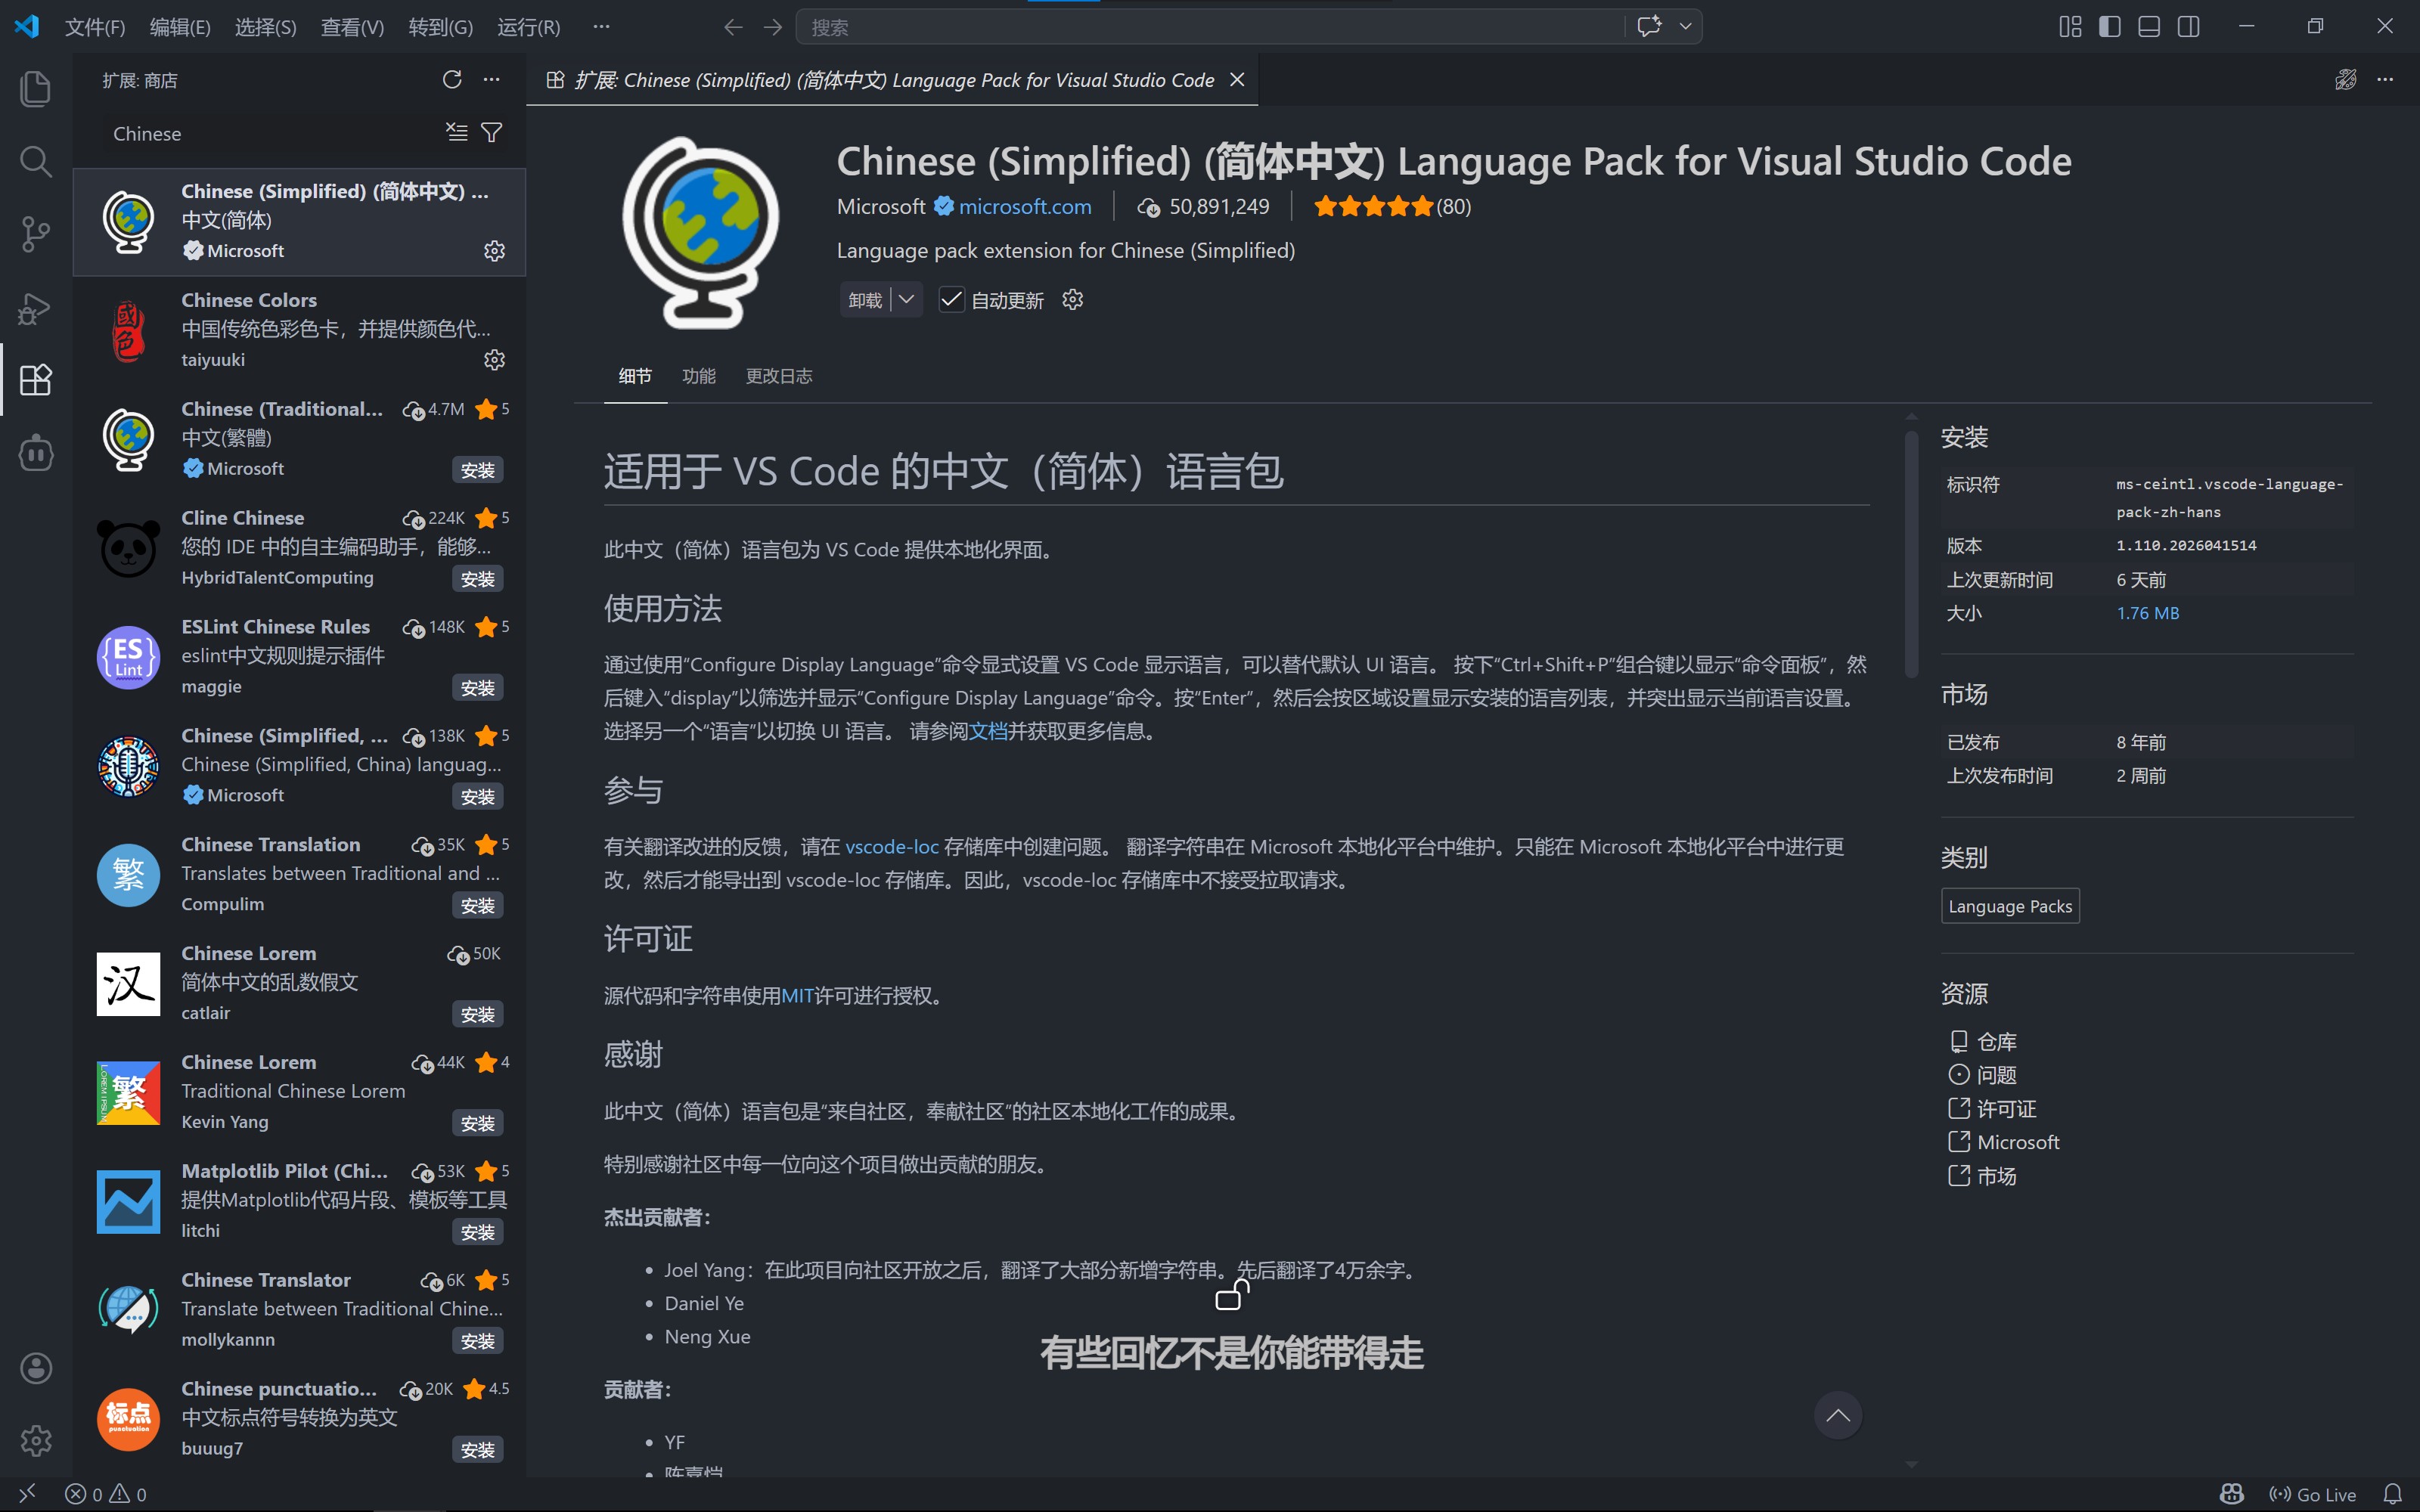
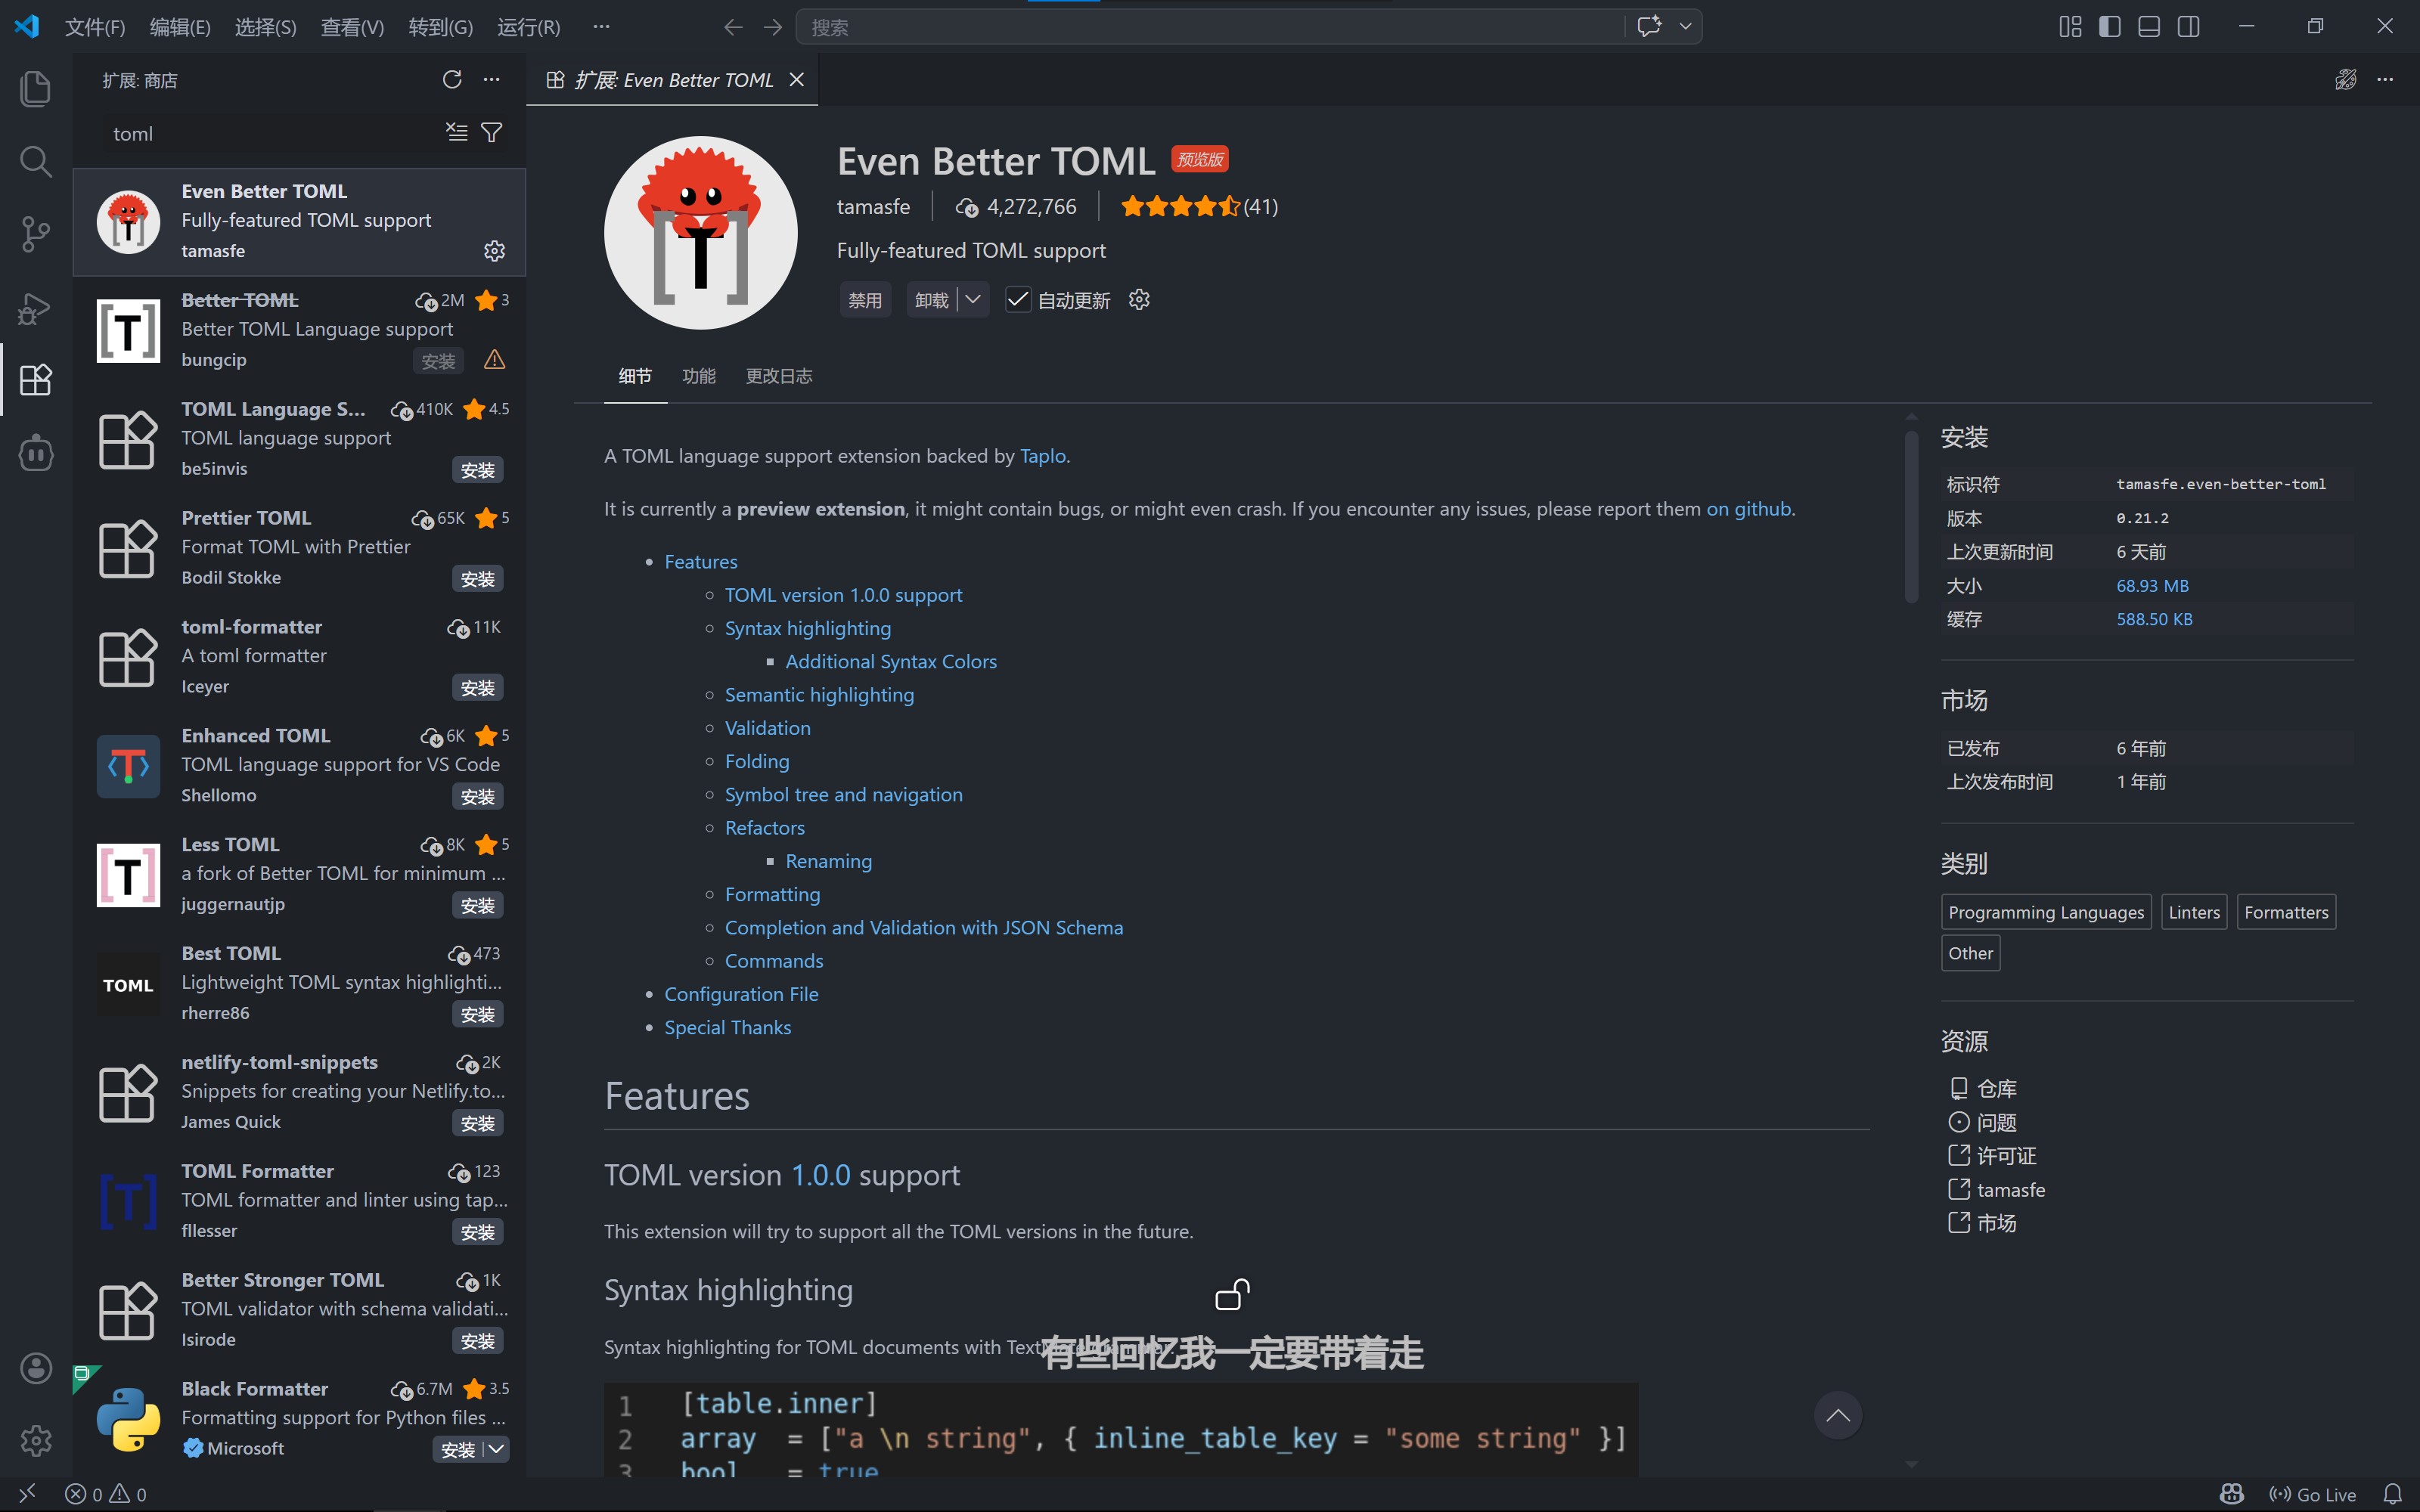
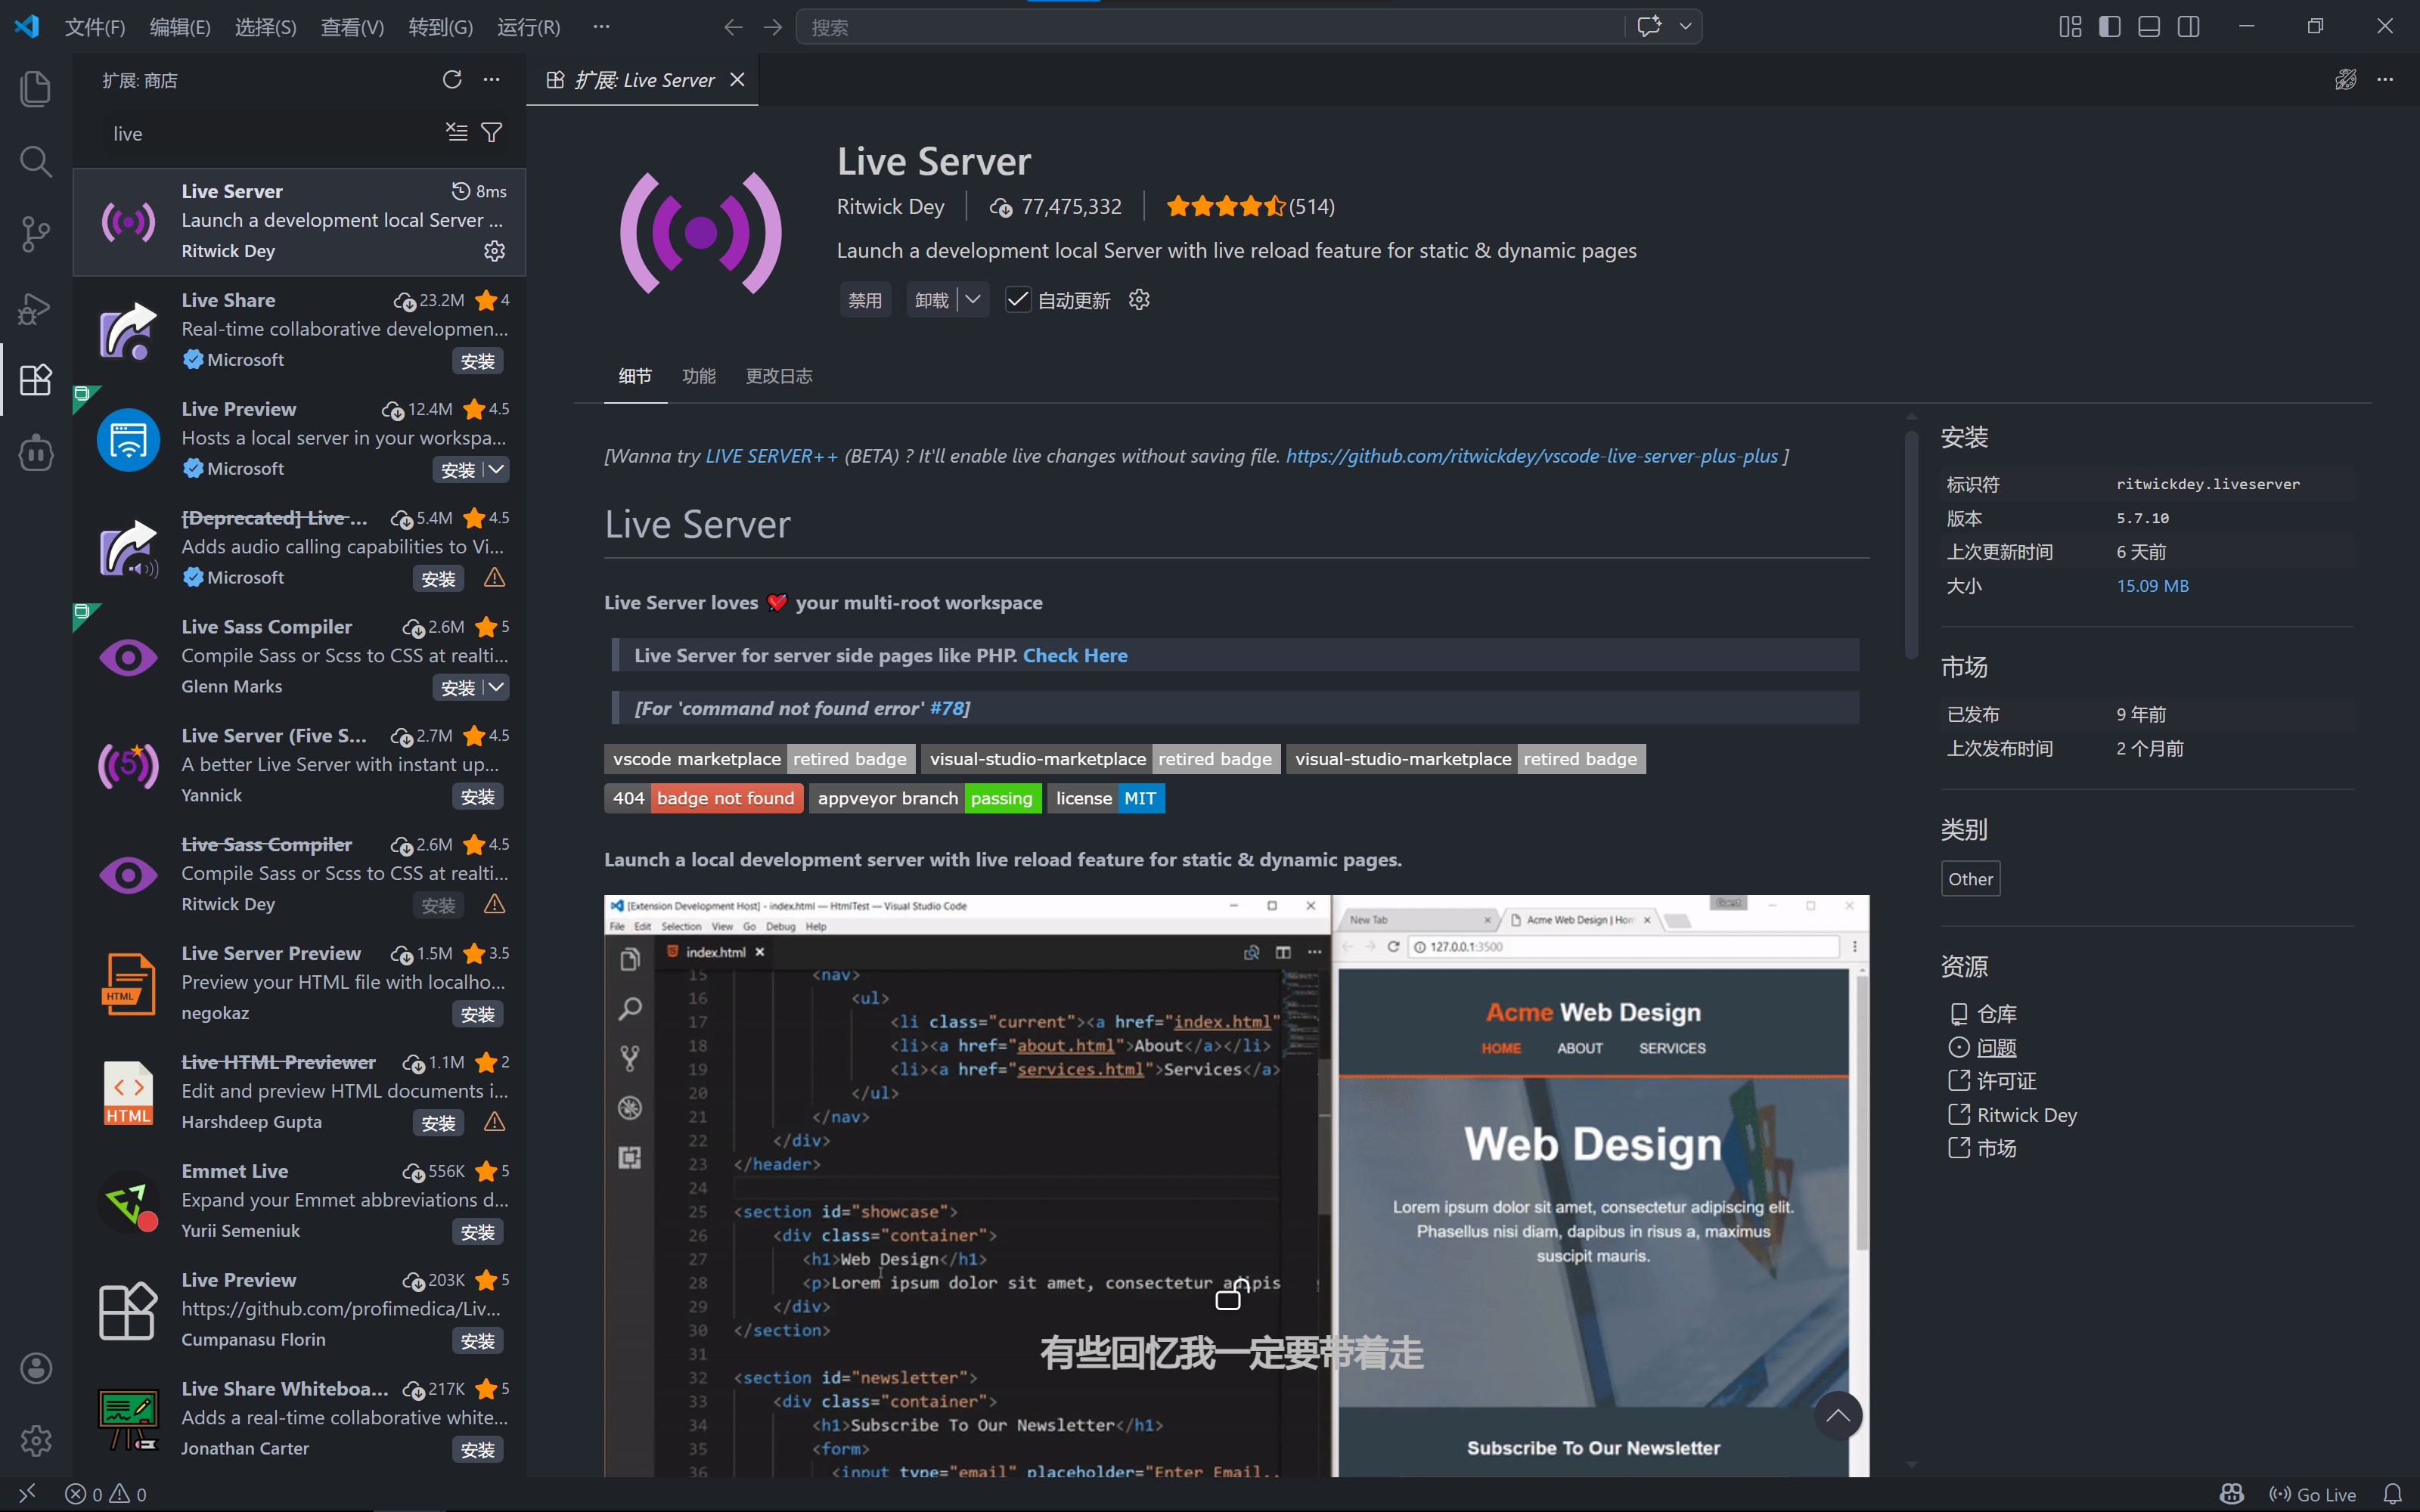
Restart VS Code after installation, and the entire software interface will be in Chinese.
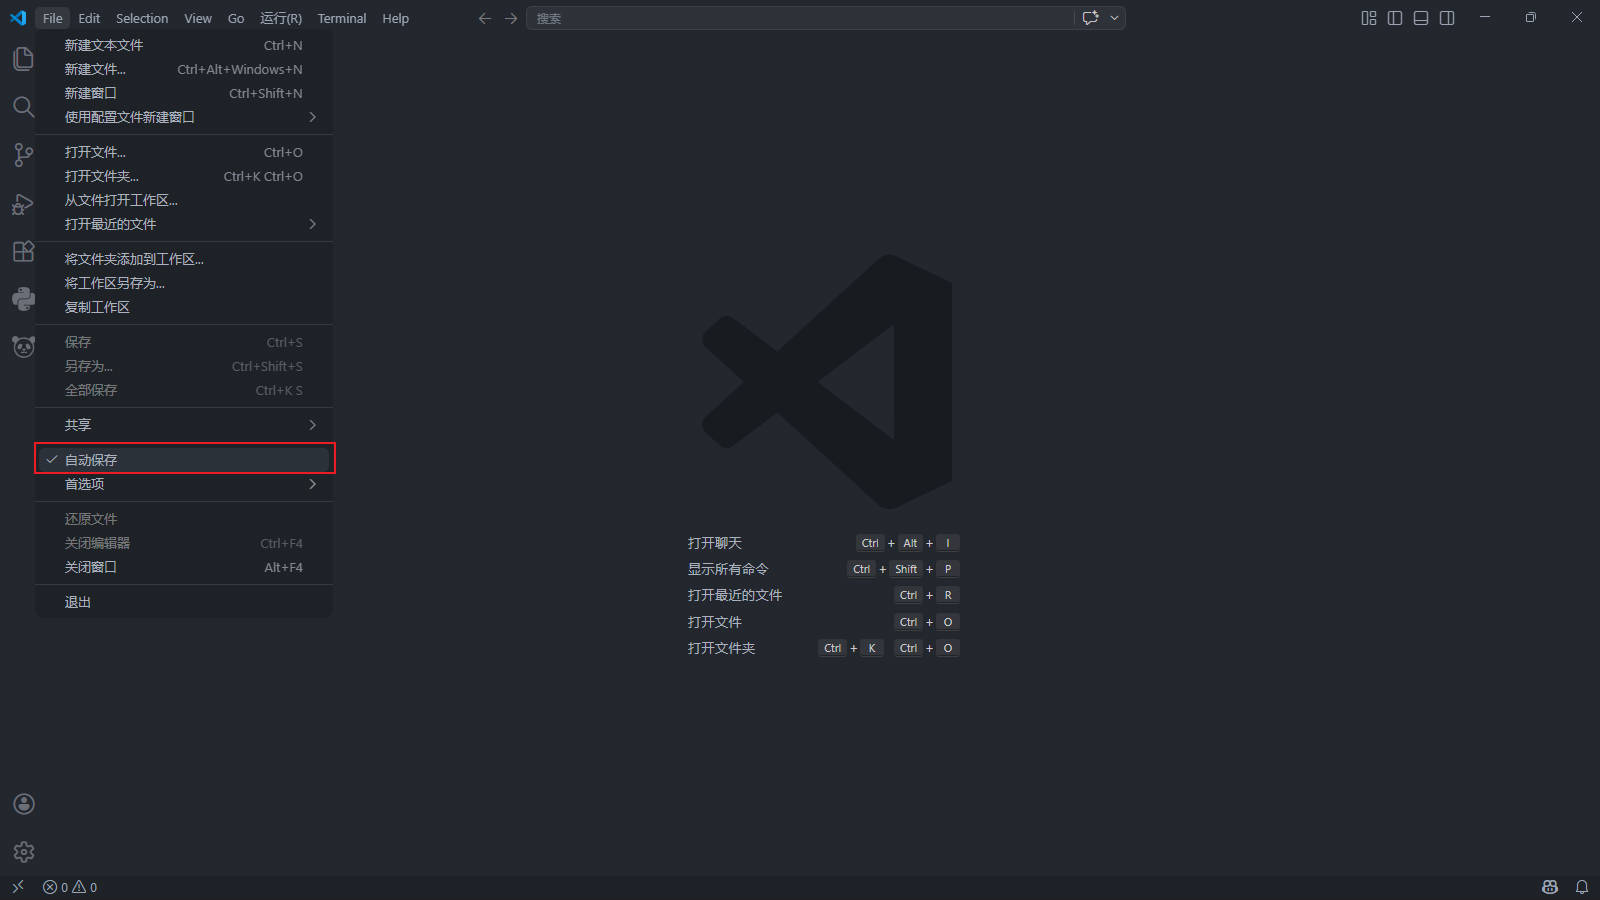
Finally, click “File” and enable “Auto Save”.
Install Git
Git is a distributed version control system that can manage source code or data versions. It is commonly used by software developers for source code control in collaborative development
— Excerpt from Wikipedia
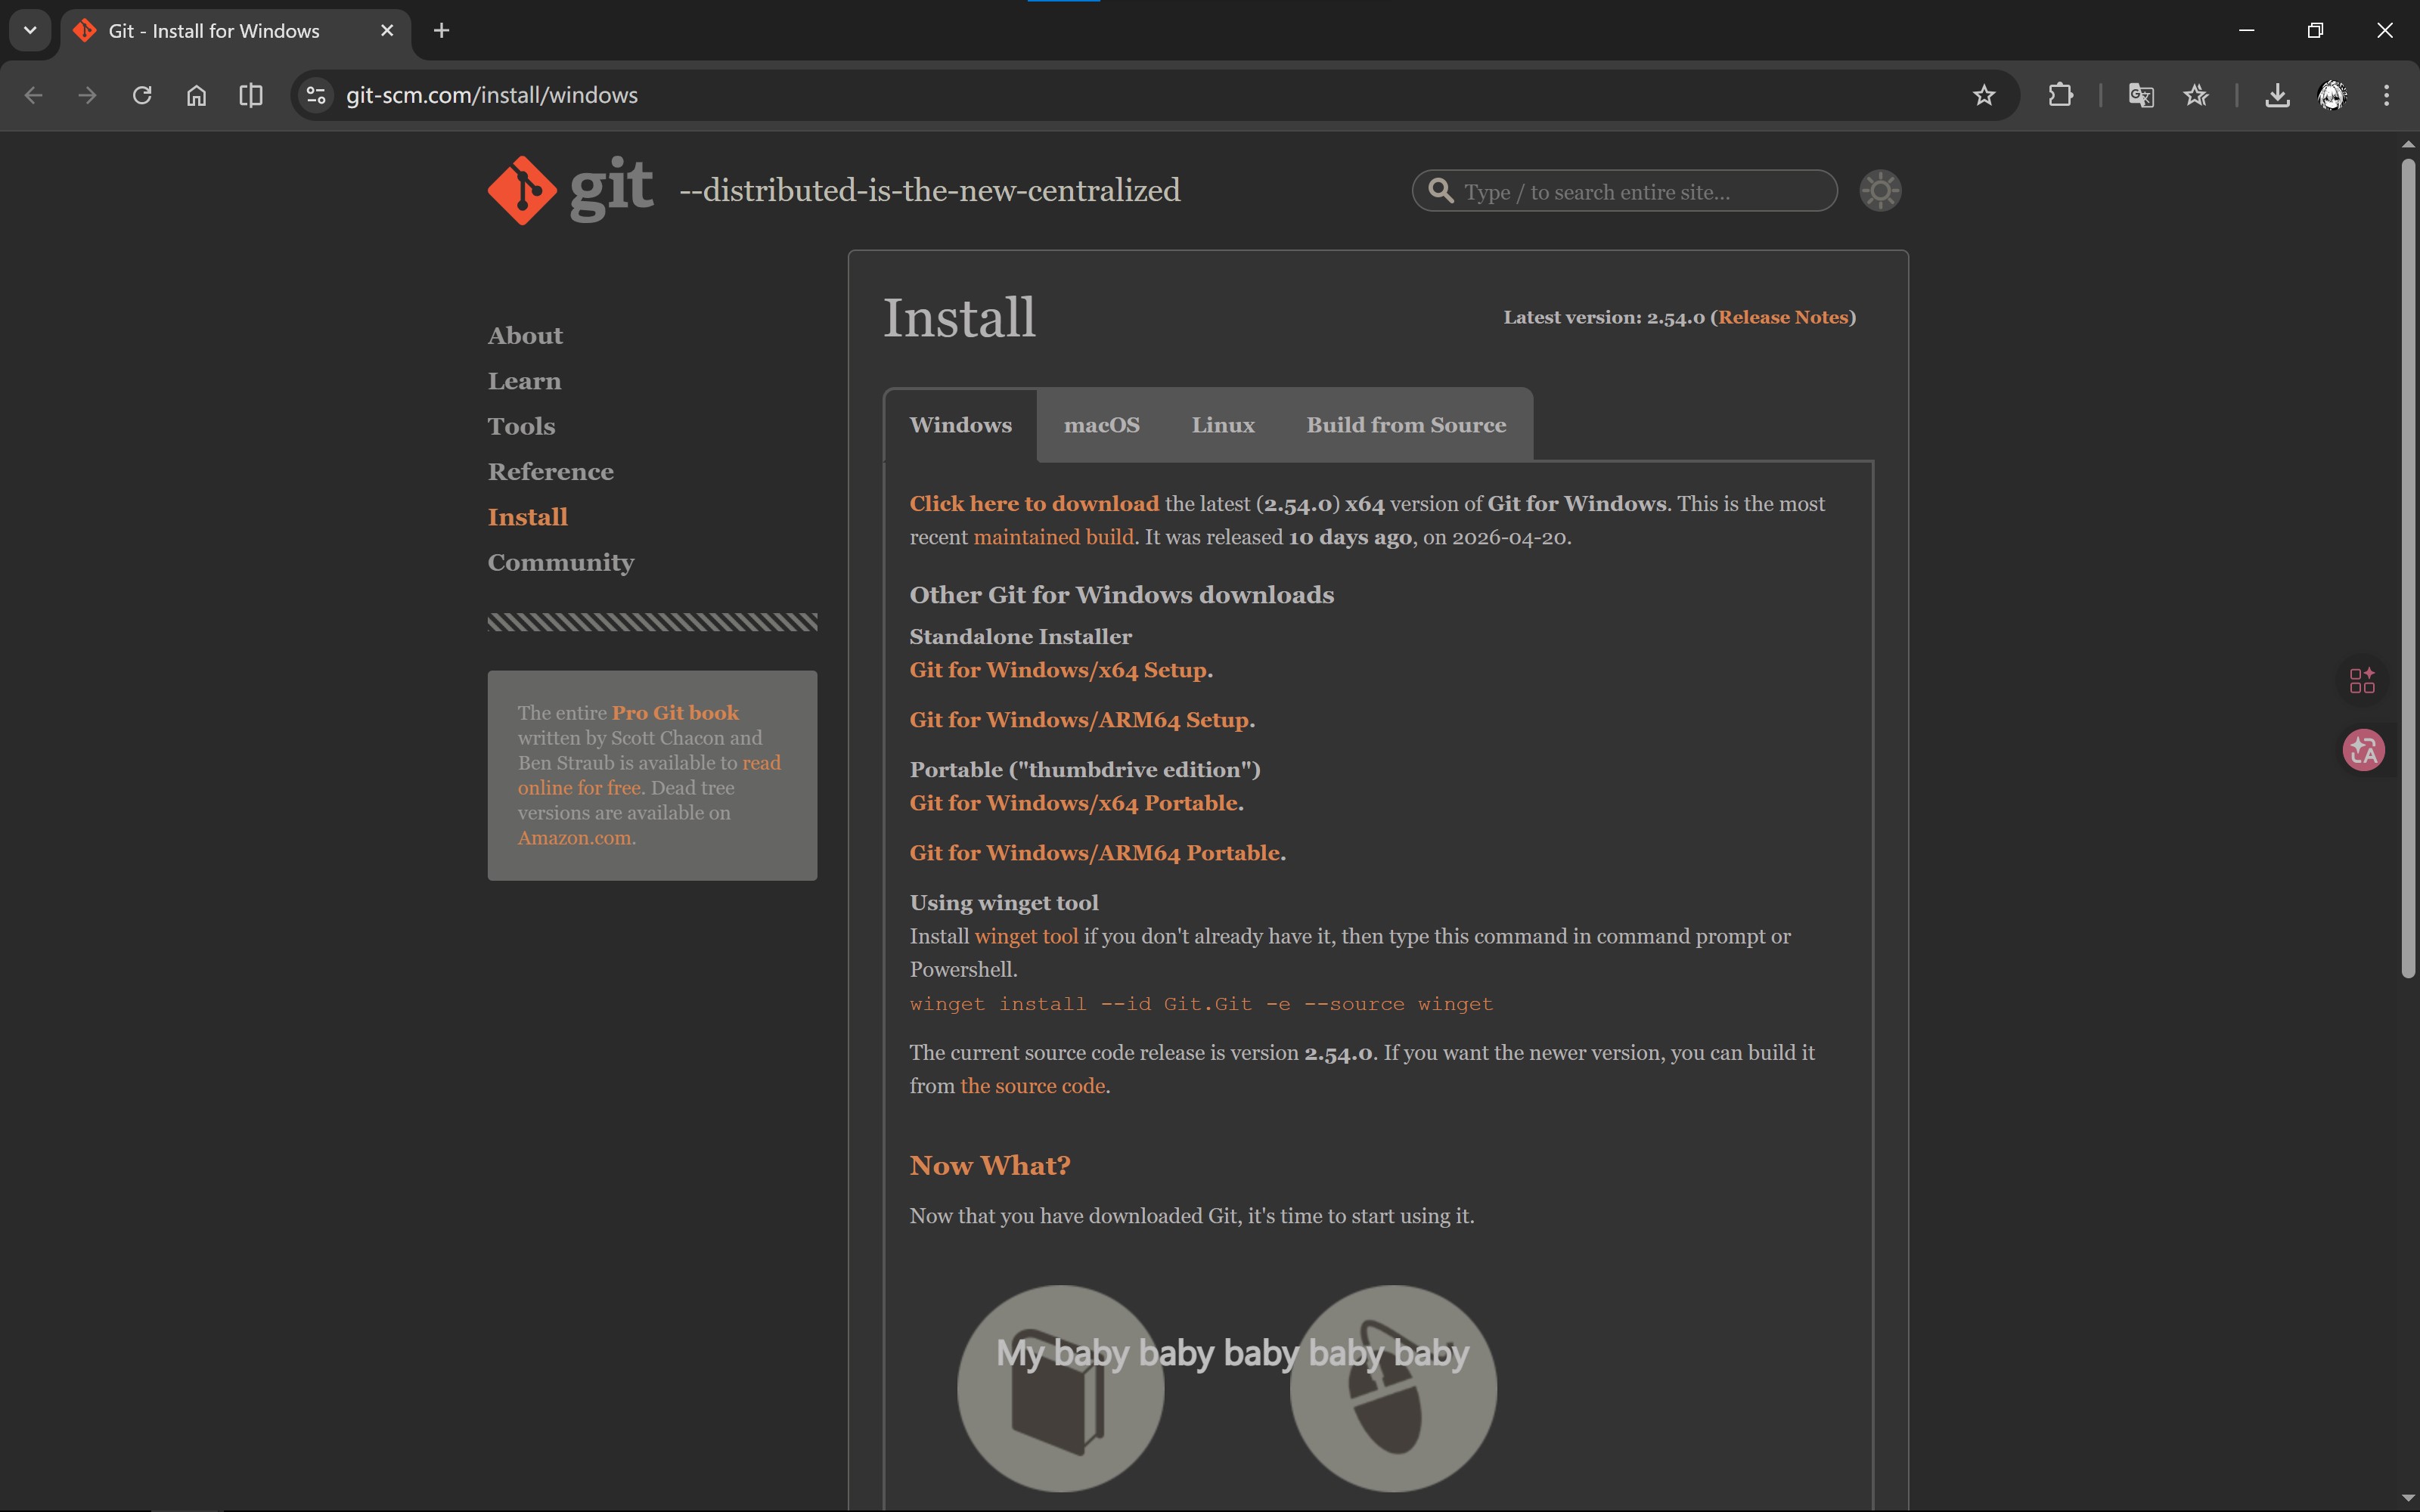
Download and Install Git
Open the Git download page and download the appropriate installer for your operating system.
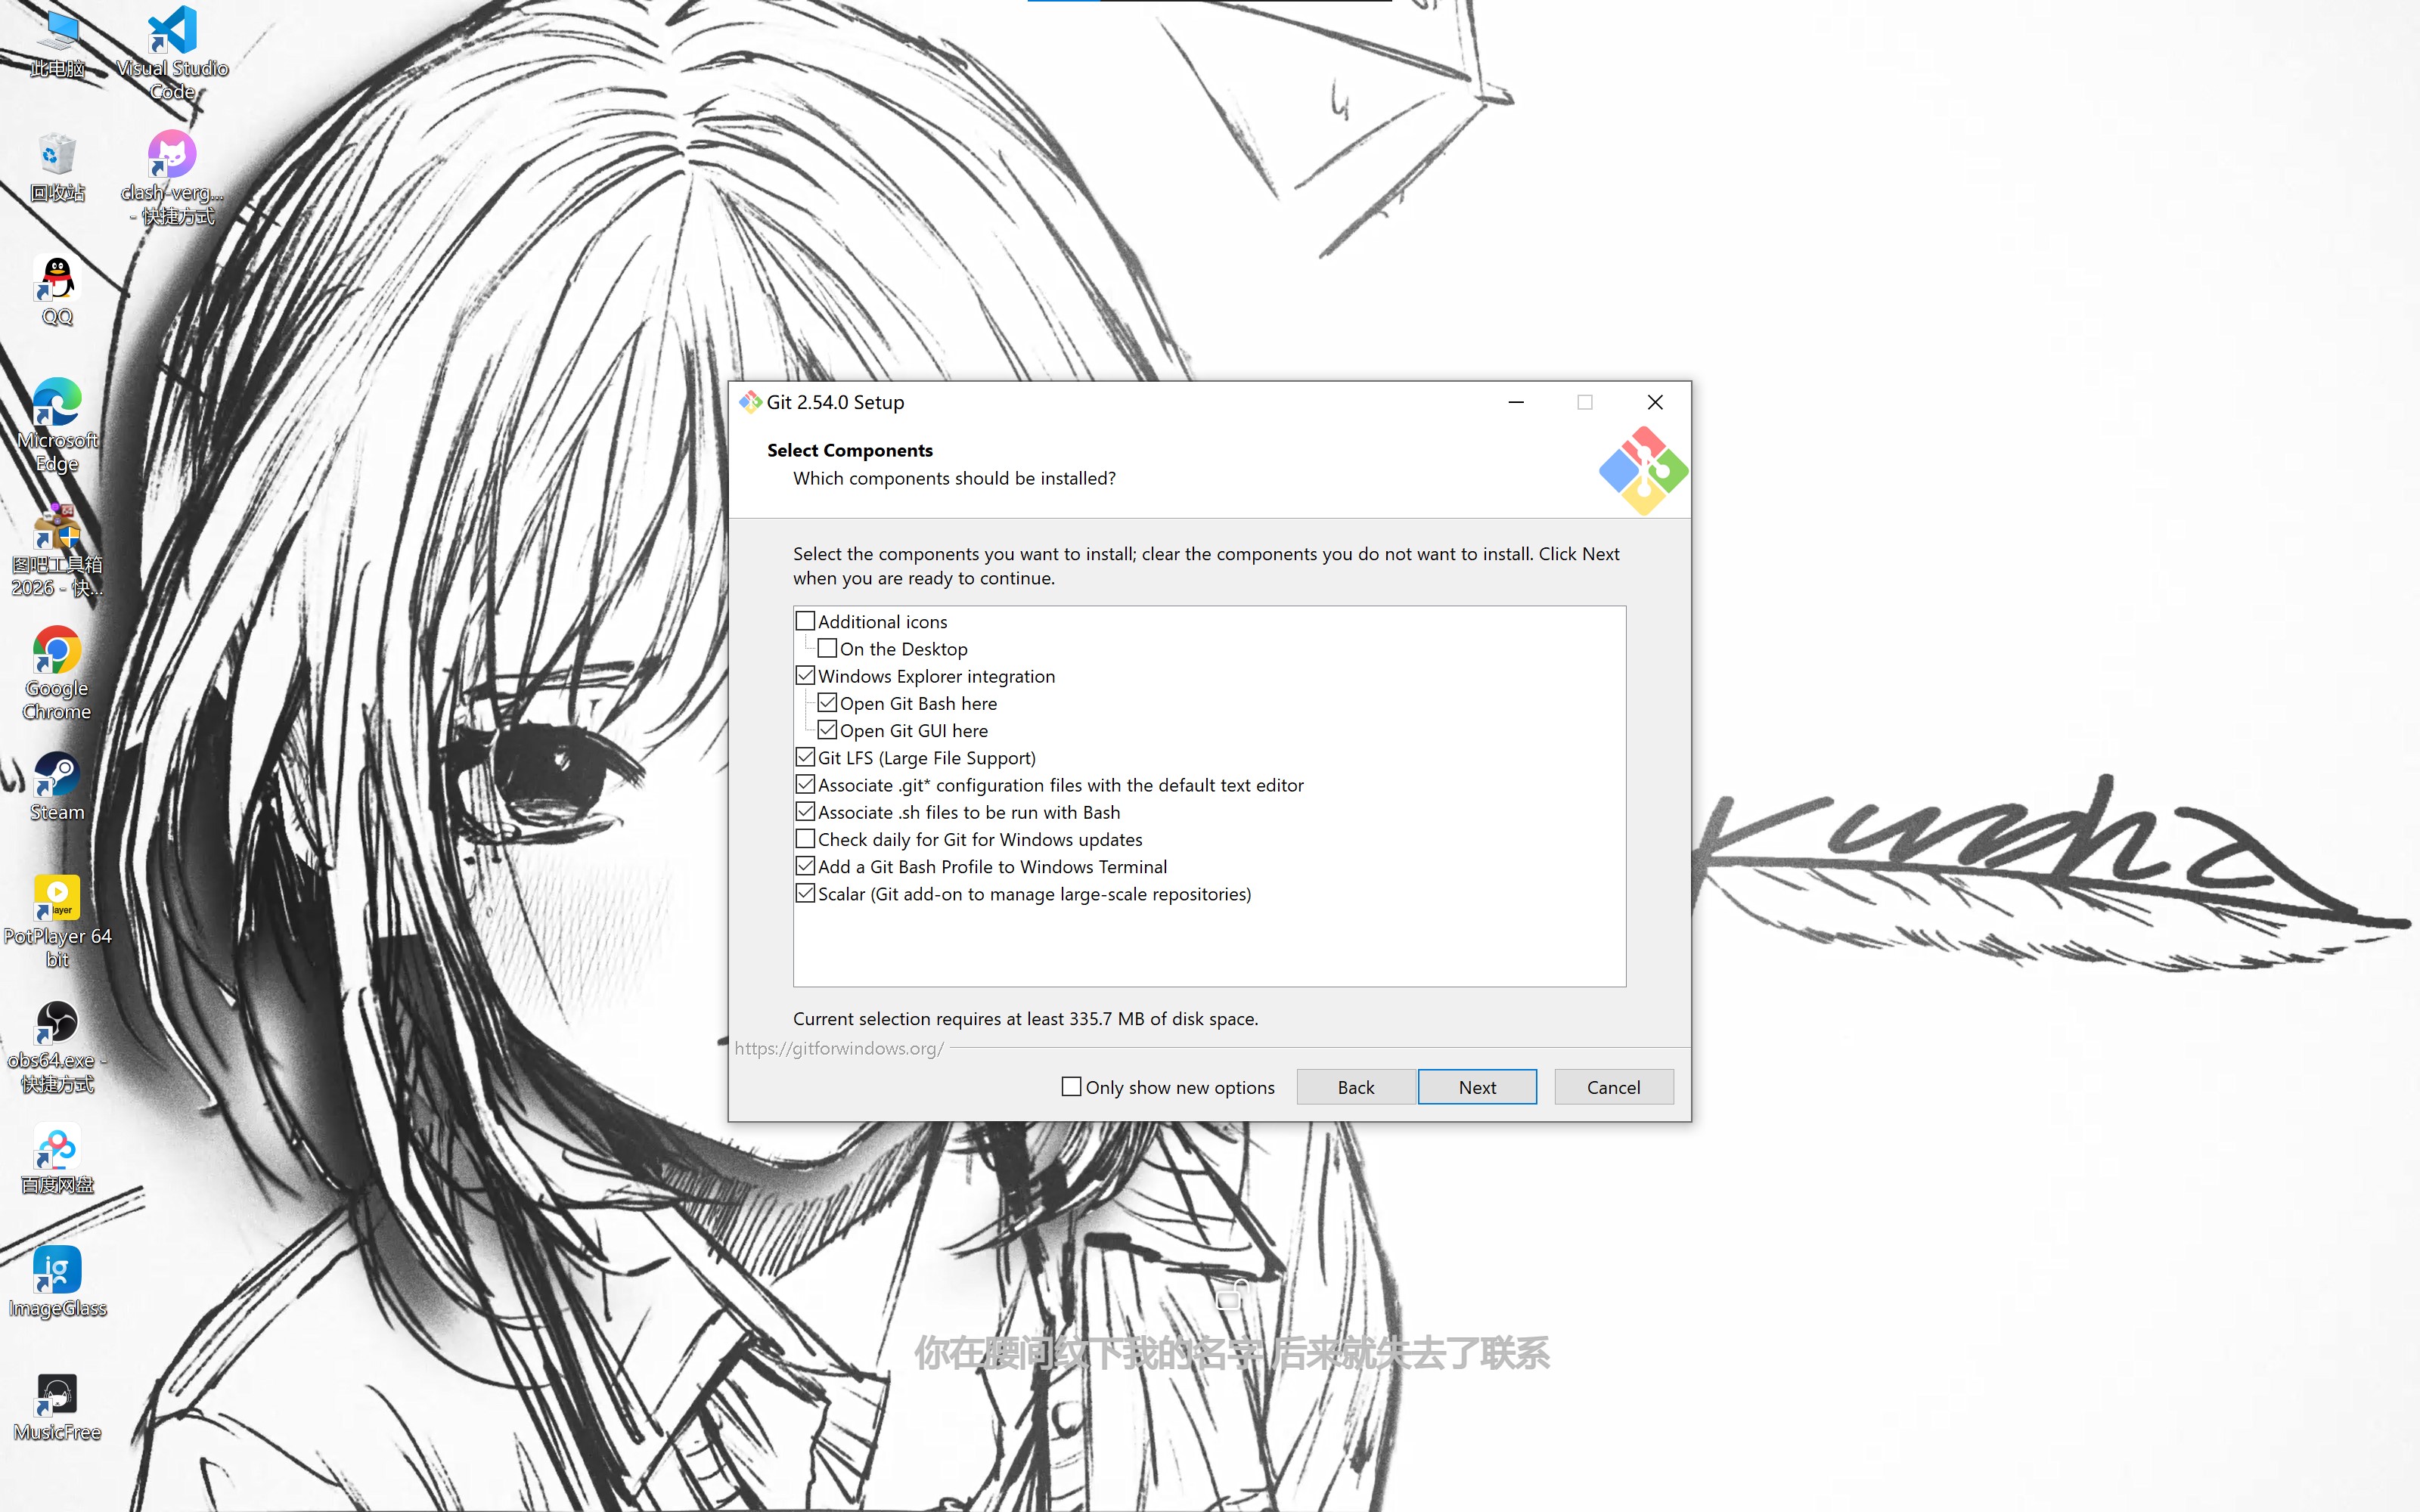
Run the Git installer, click “Next” to reach the following screen, check the options as shown and complete the installation.
Configure GitHub
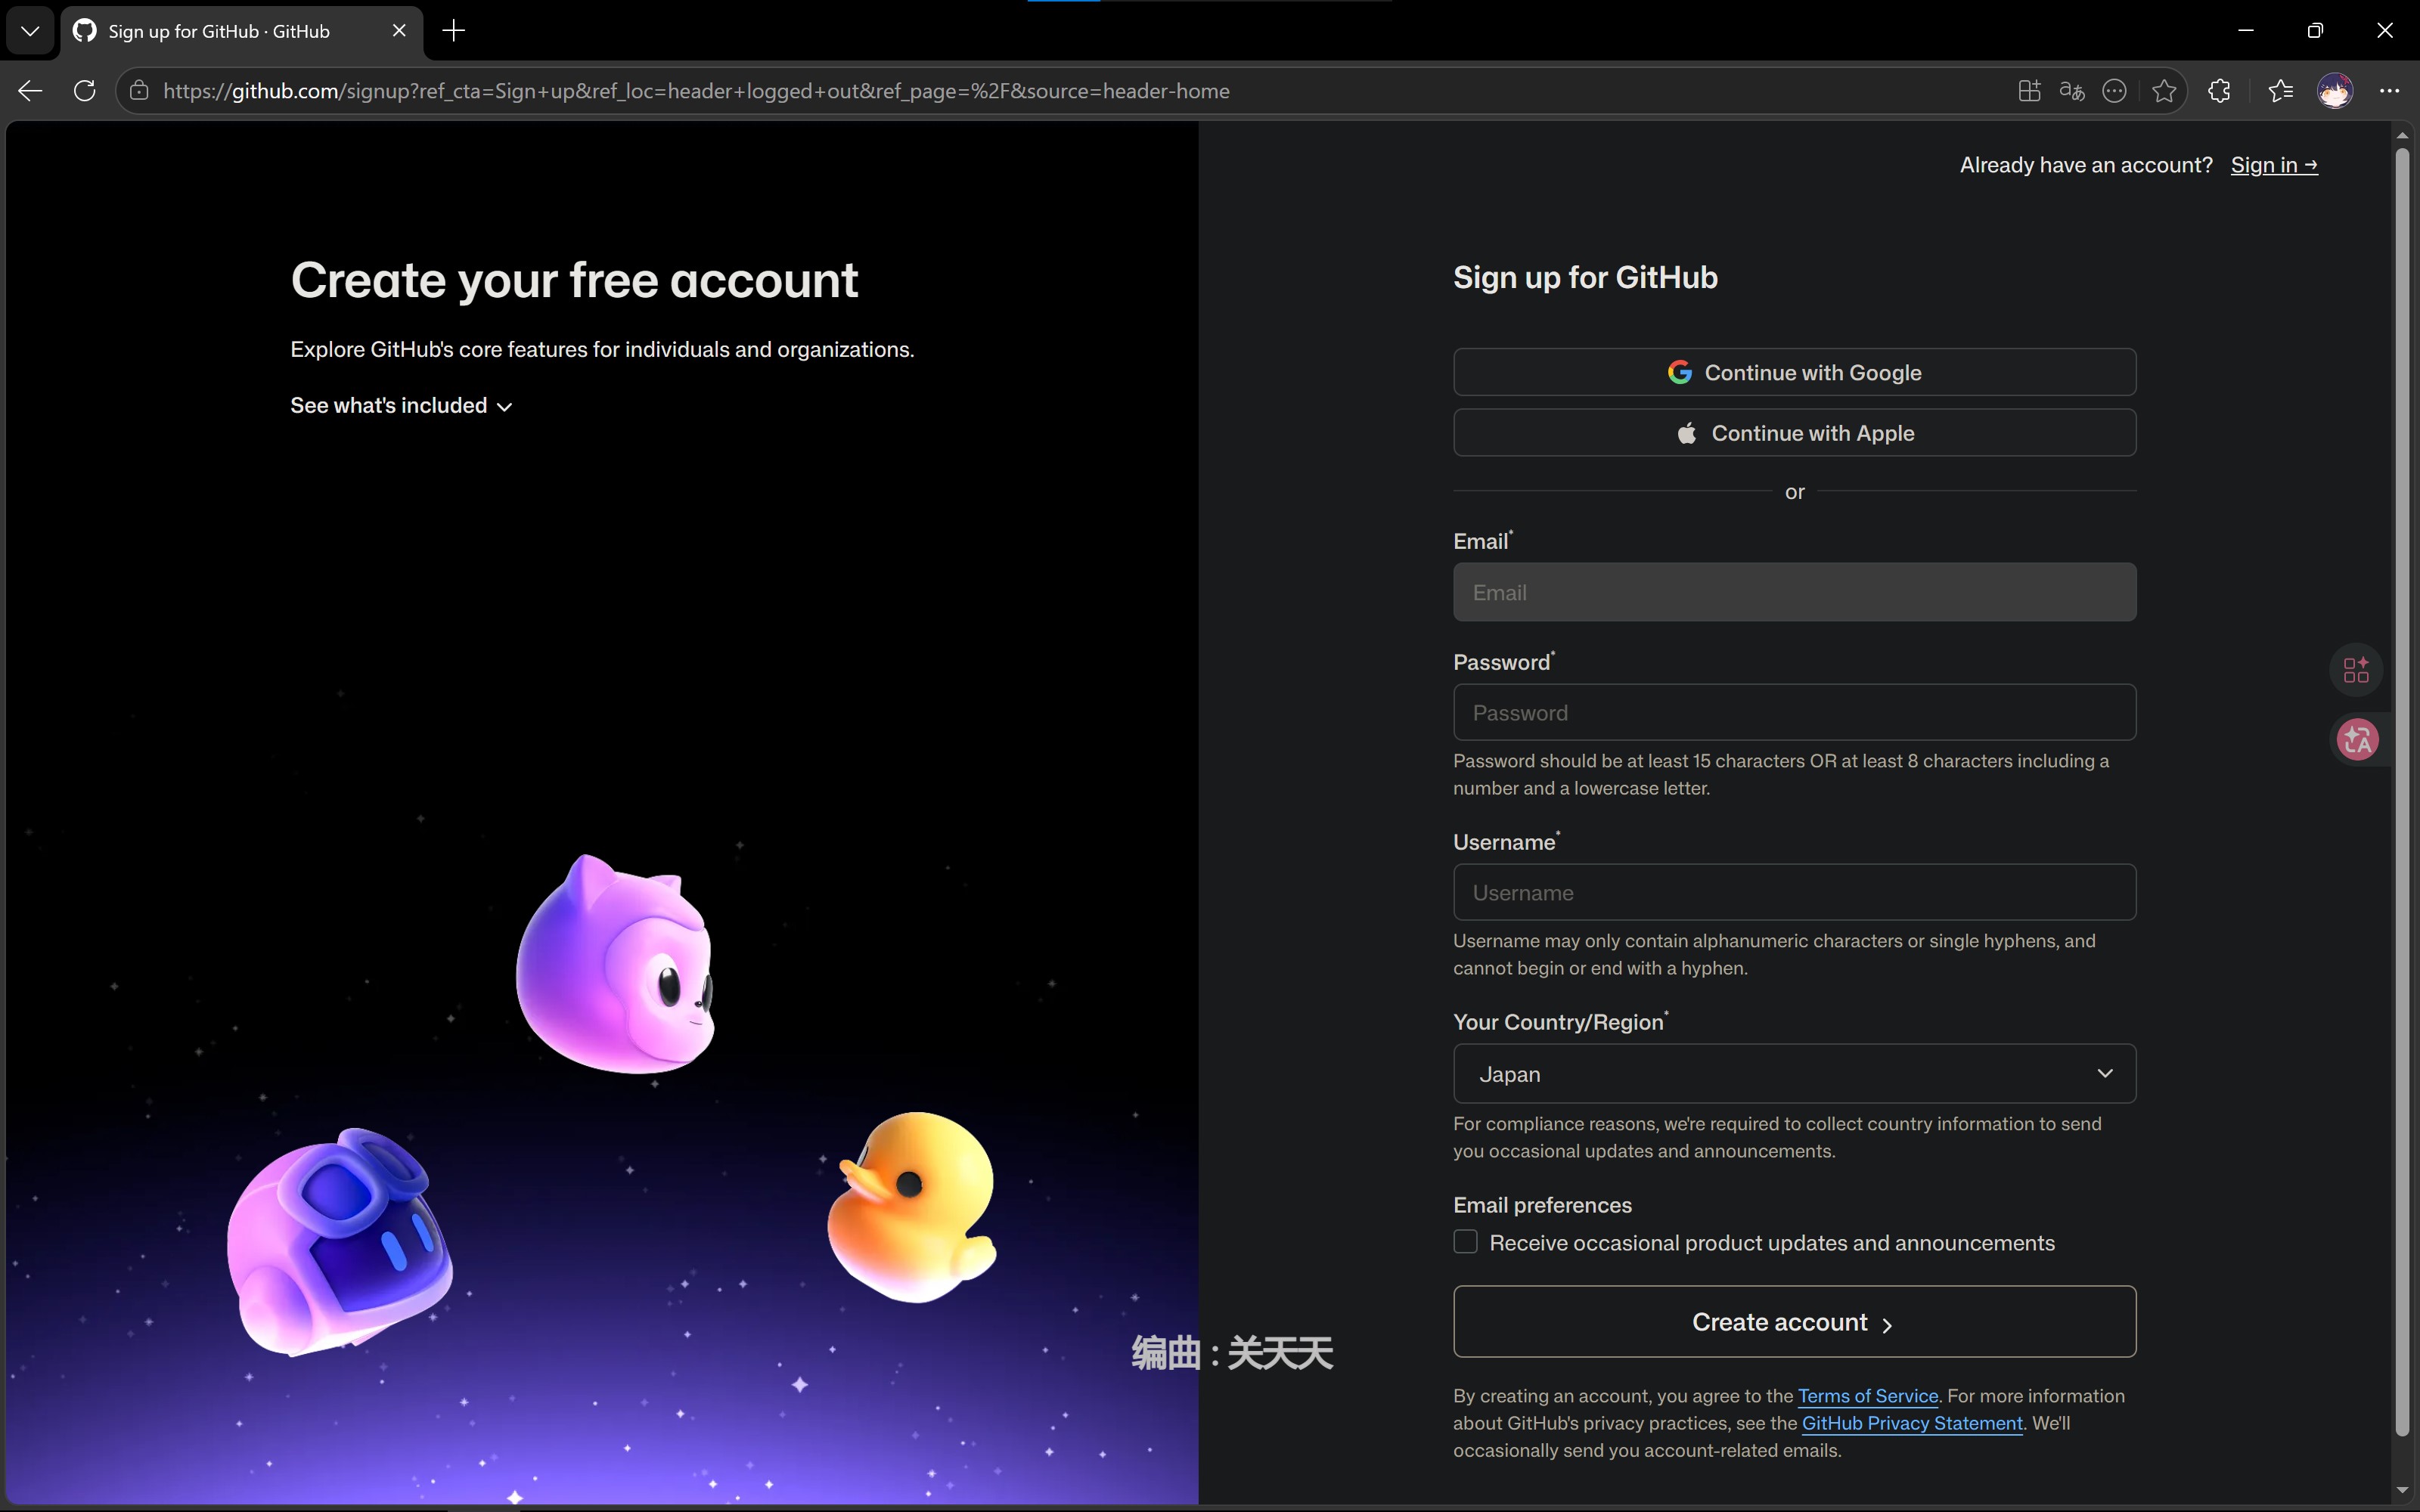
Register a GitHub Account
Open GitHub’s homepage, click “Sign up”, fill in your information to complete registration.

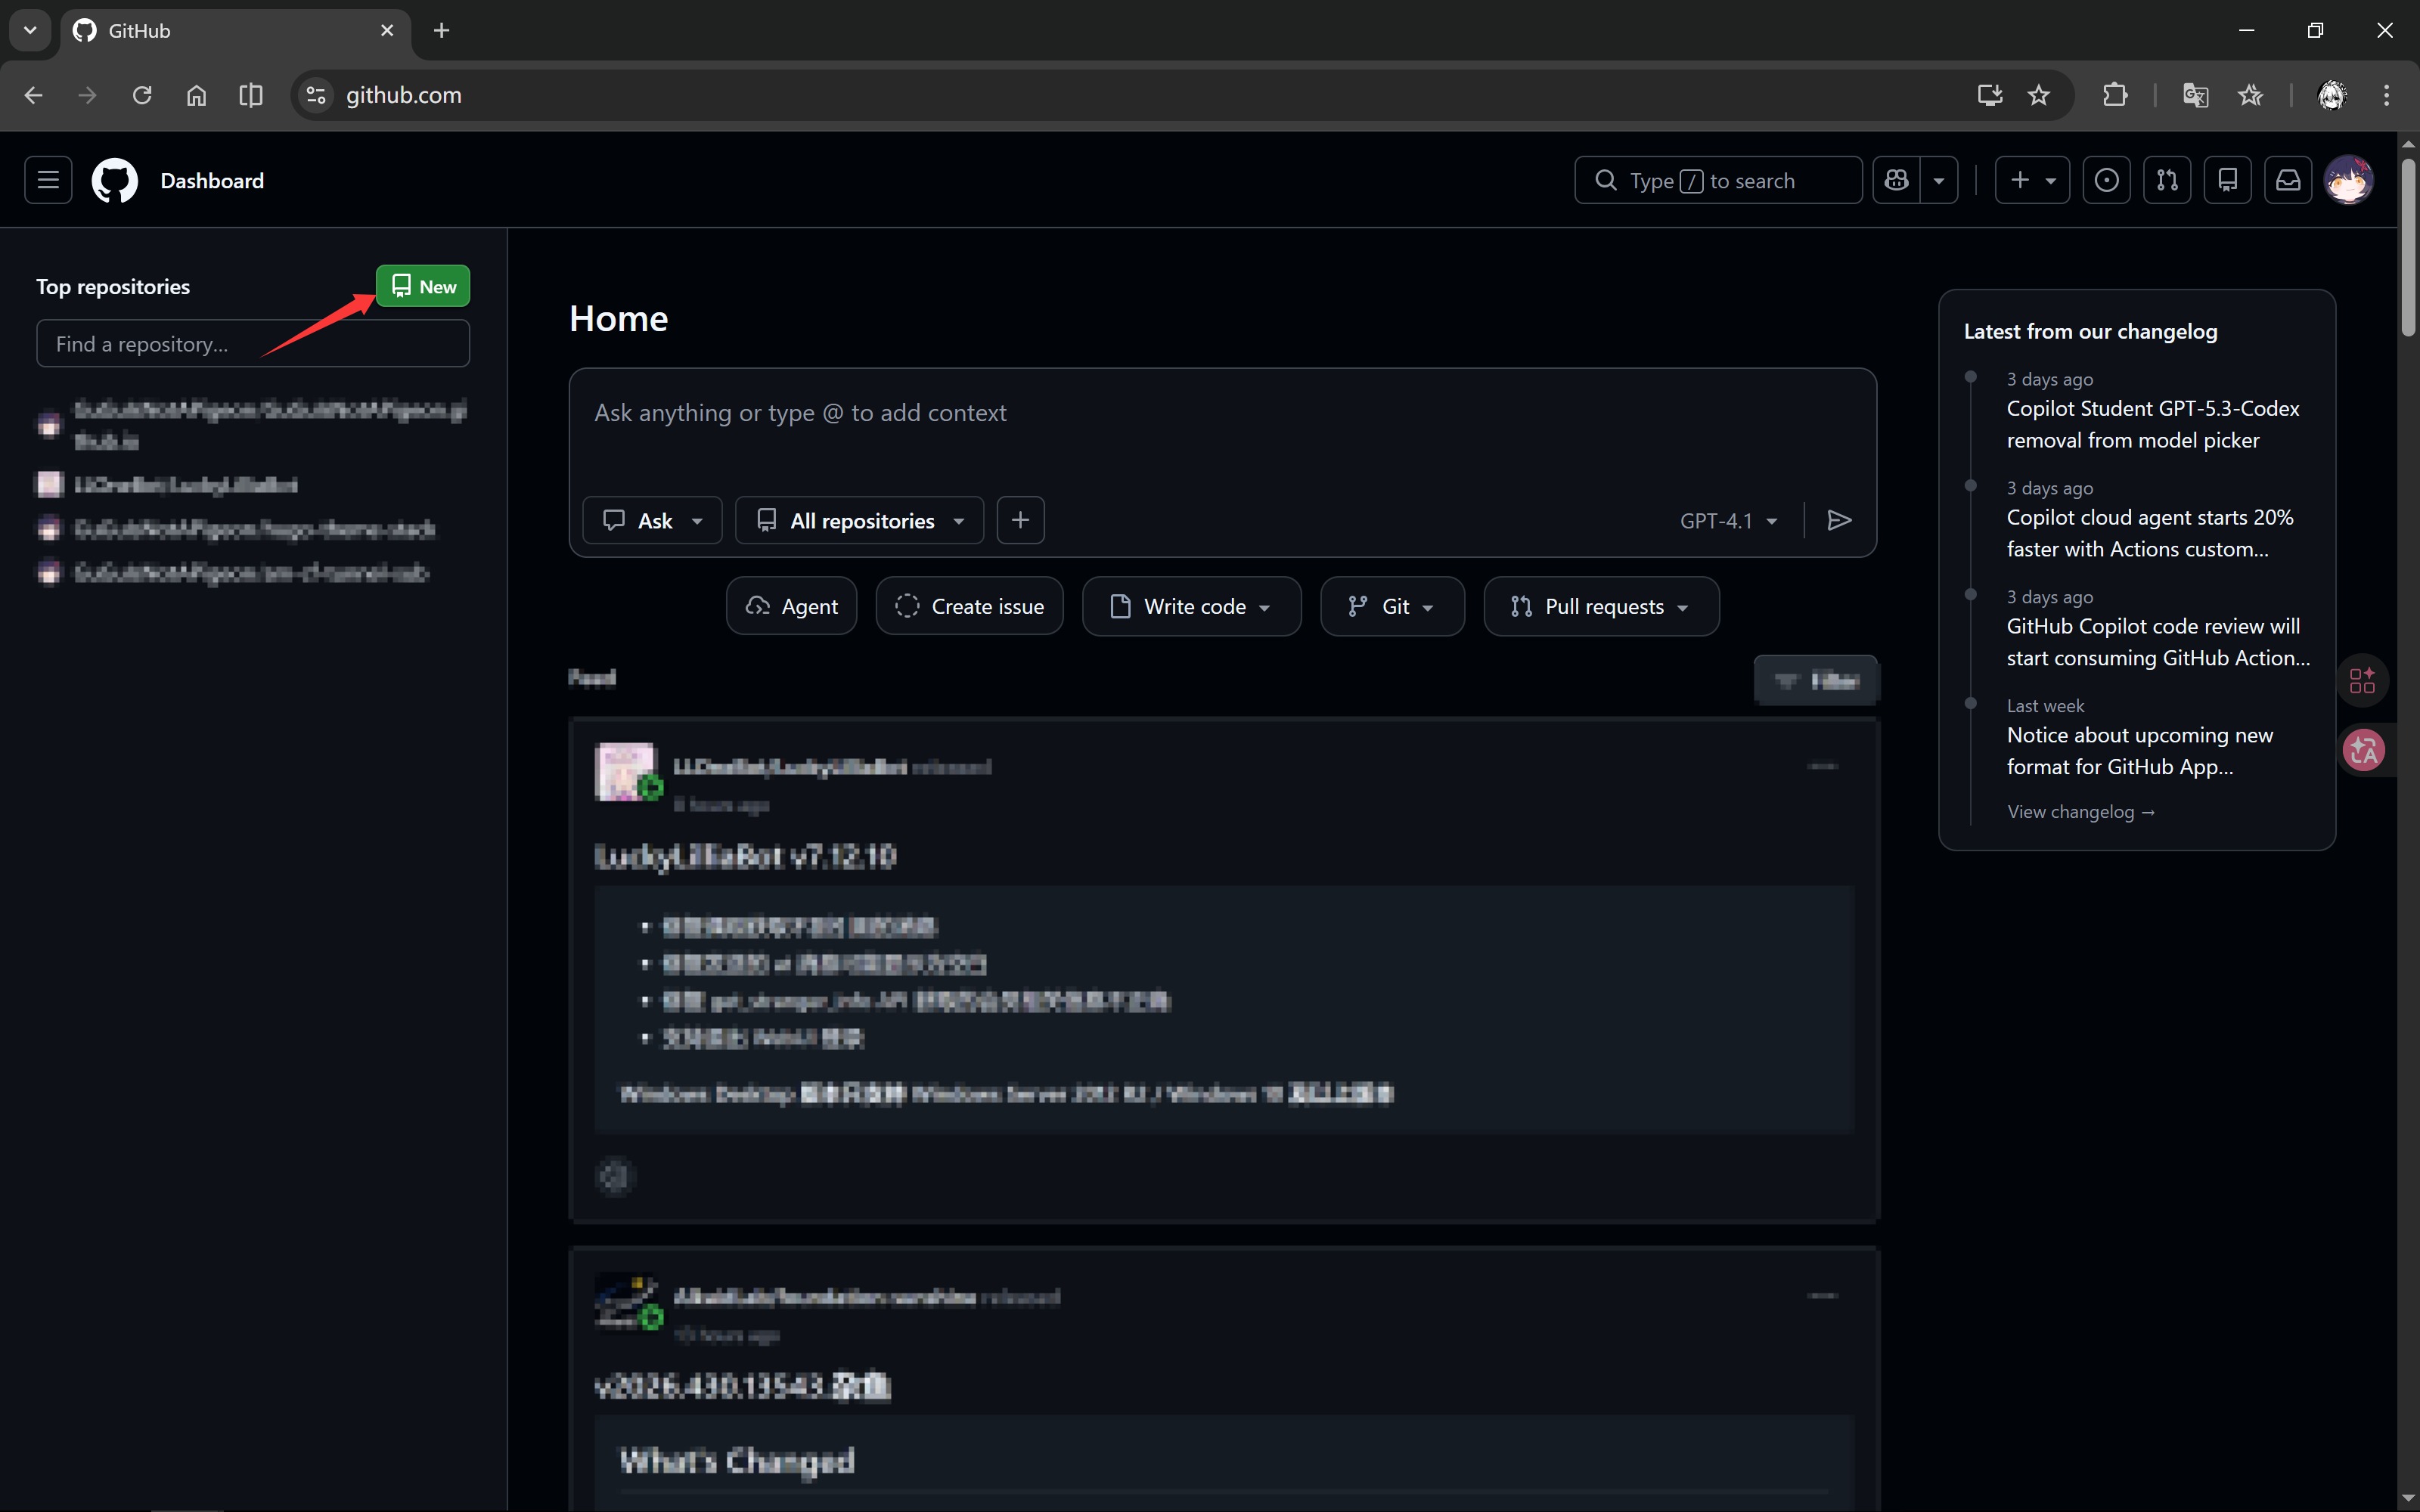
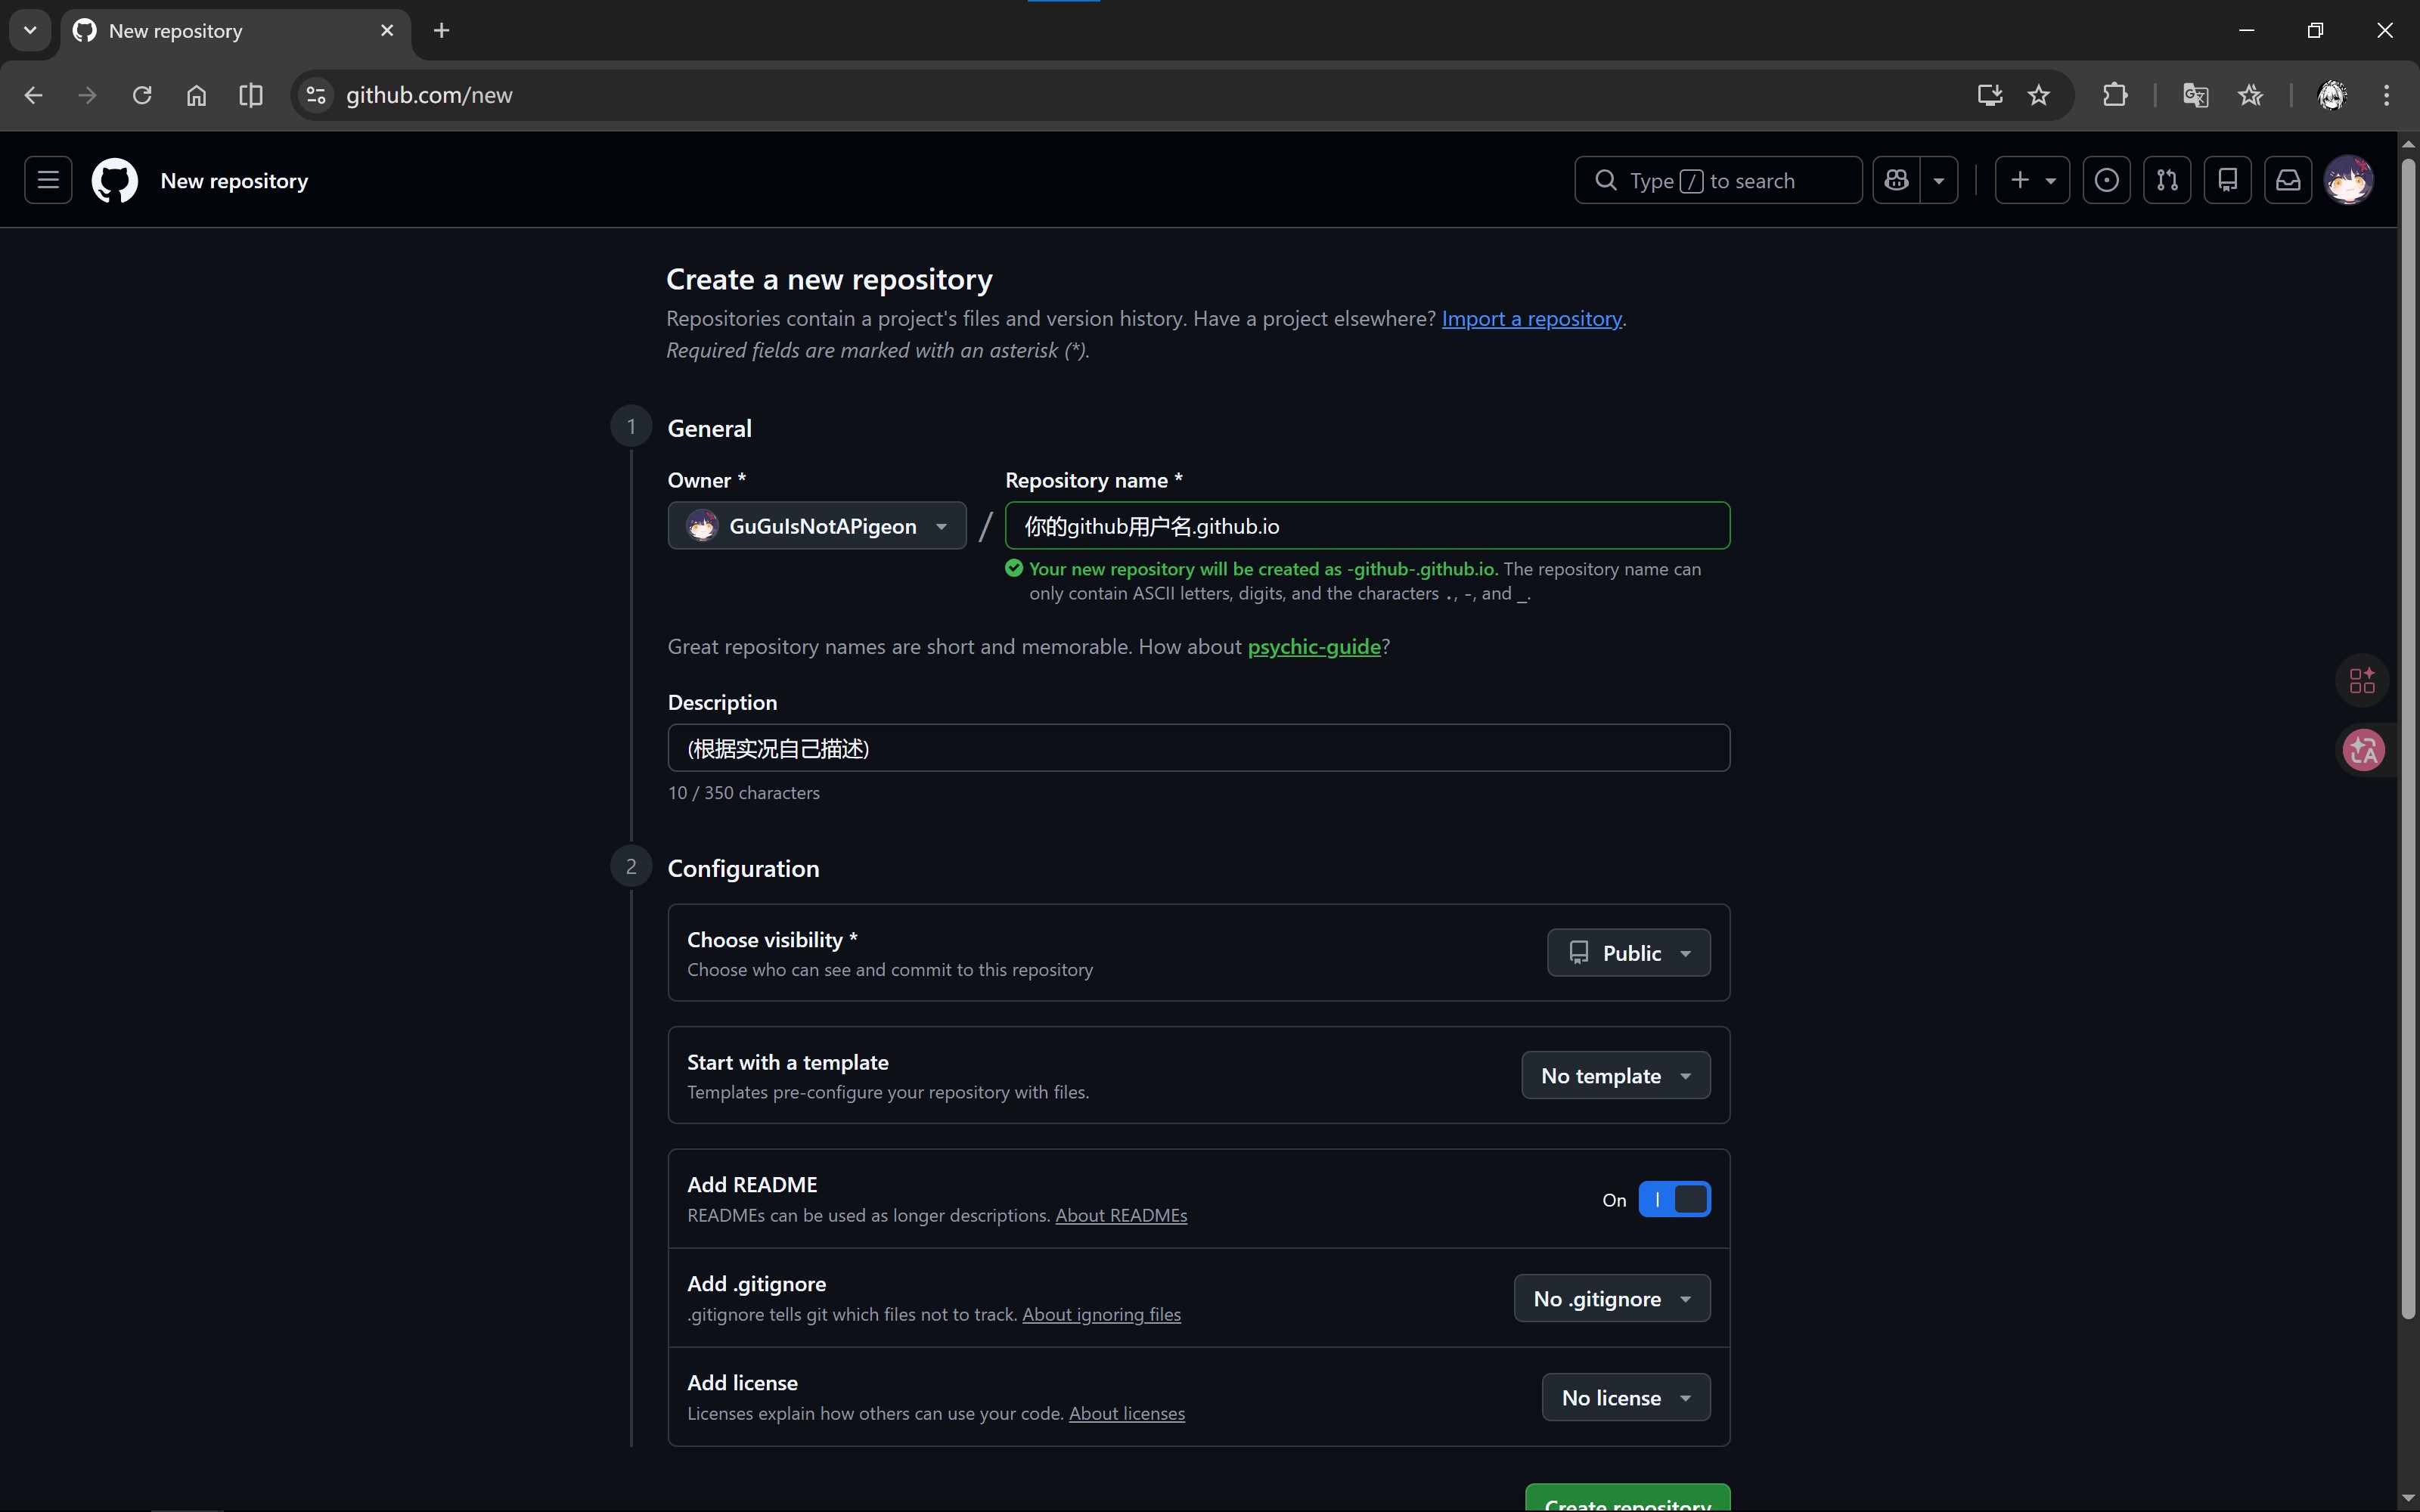
Create a New Repository
Go to GitHub’s homepage, click “New” to create a new repository, fill in “Repository name” with “your-github-username.github.io”, fill in “Description” with a description for your project, and check “Add a README file”.
Configure SSH Key
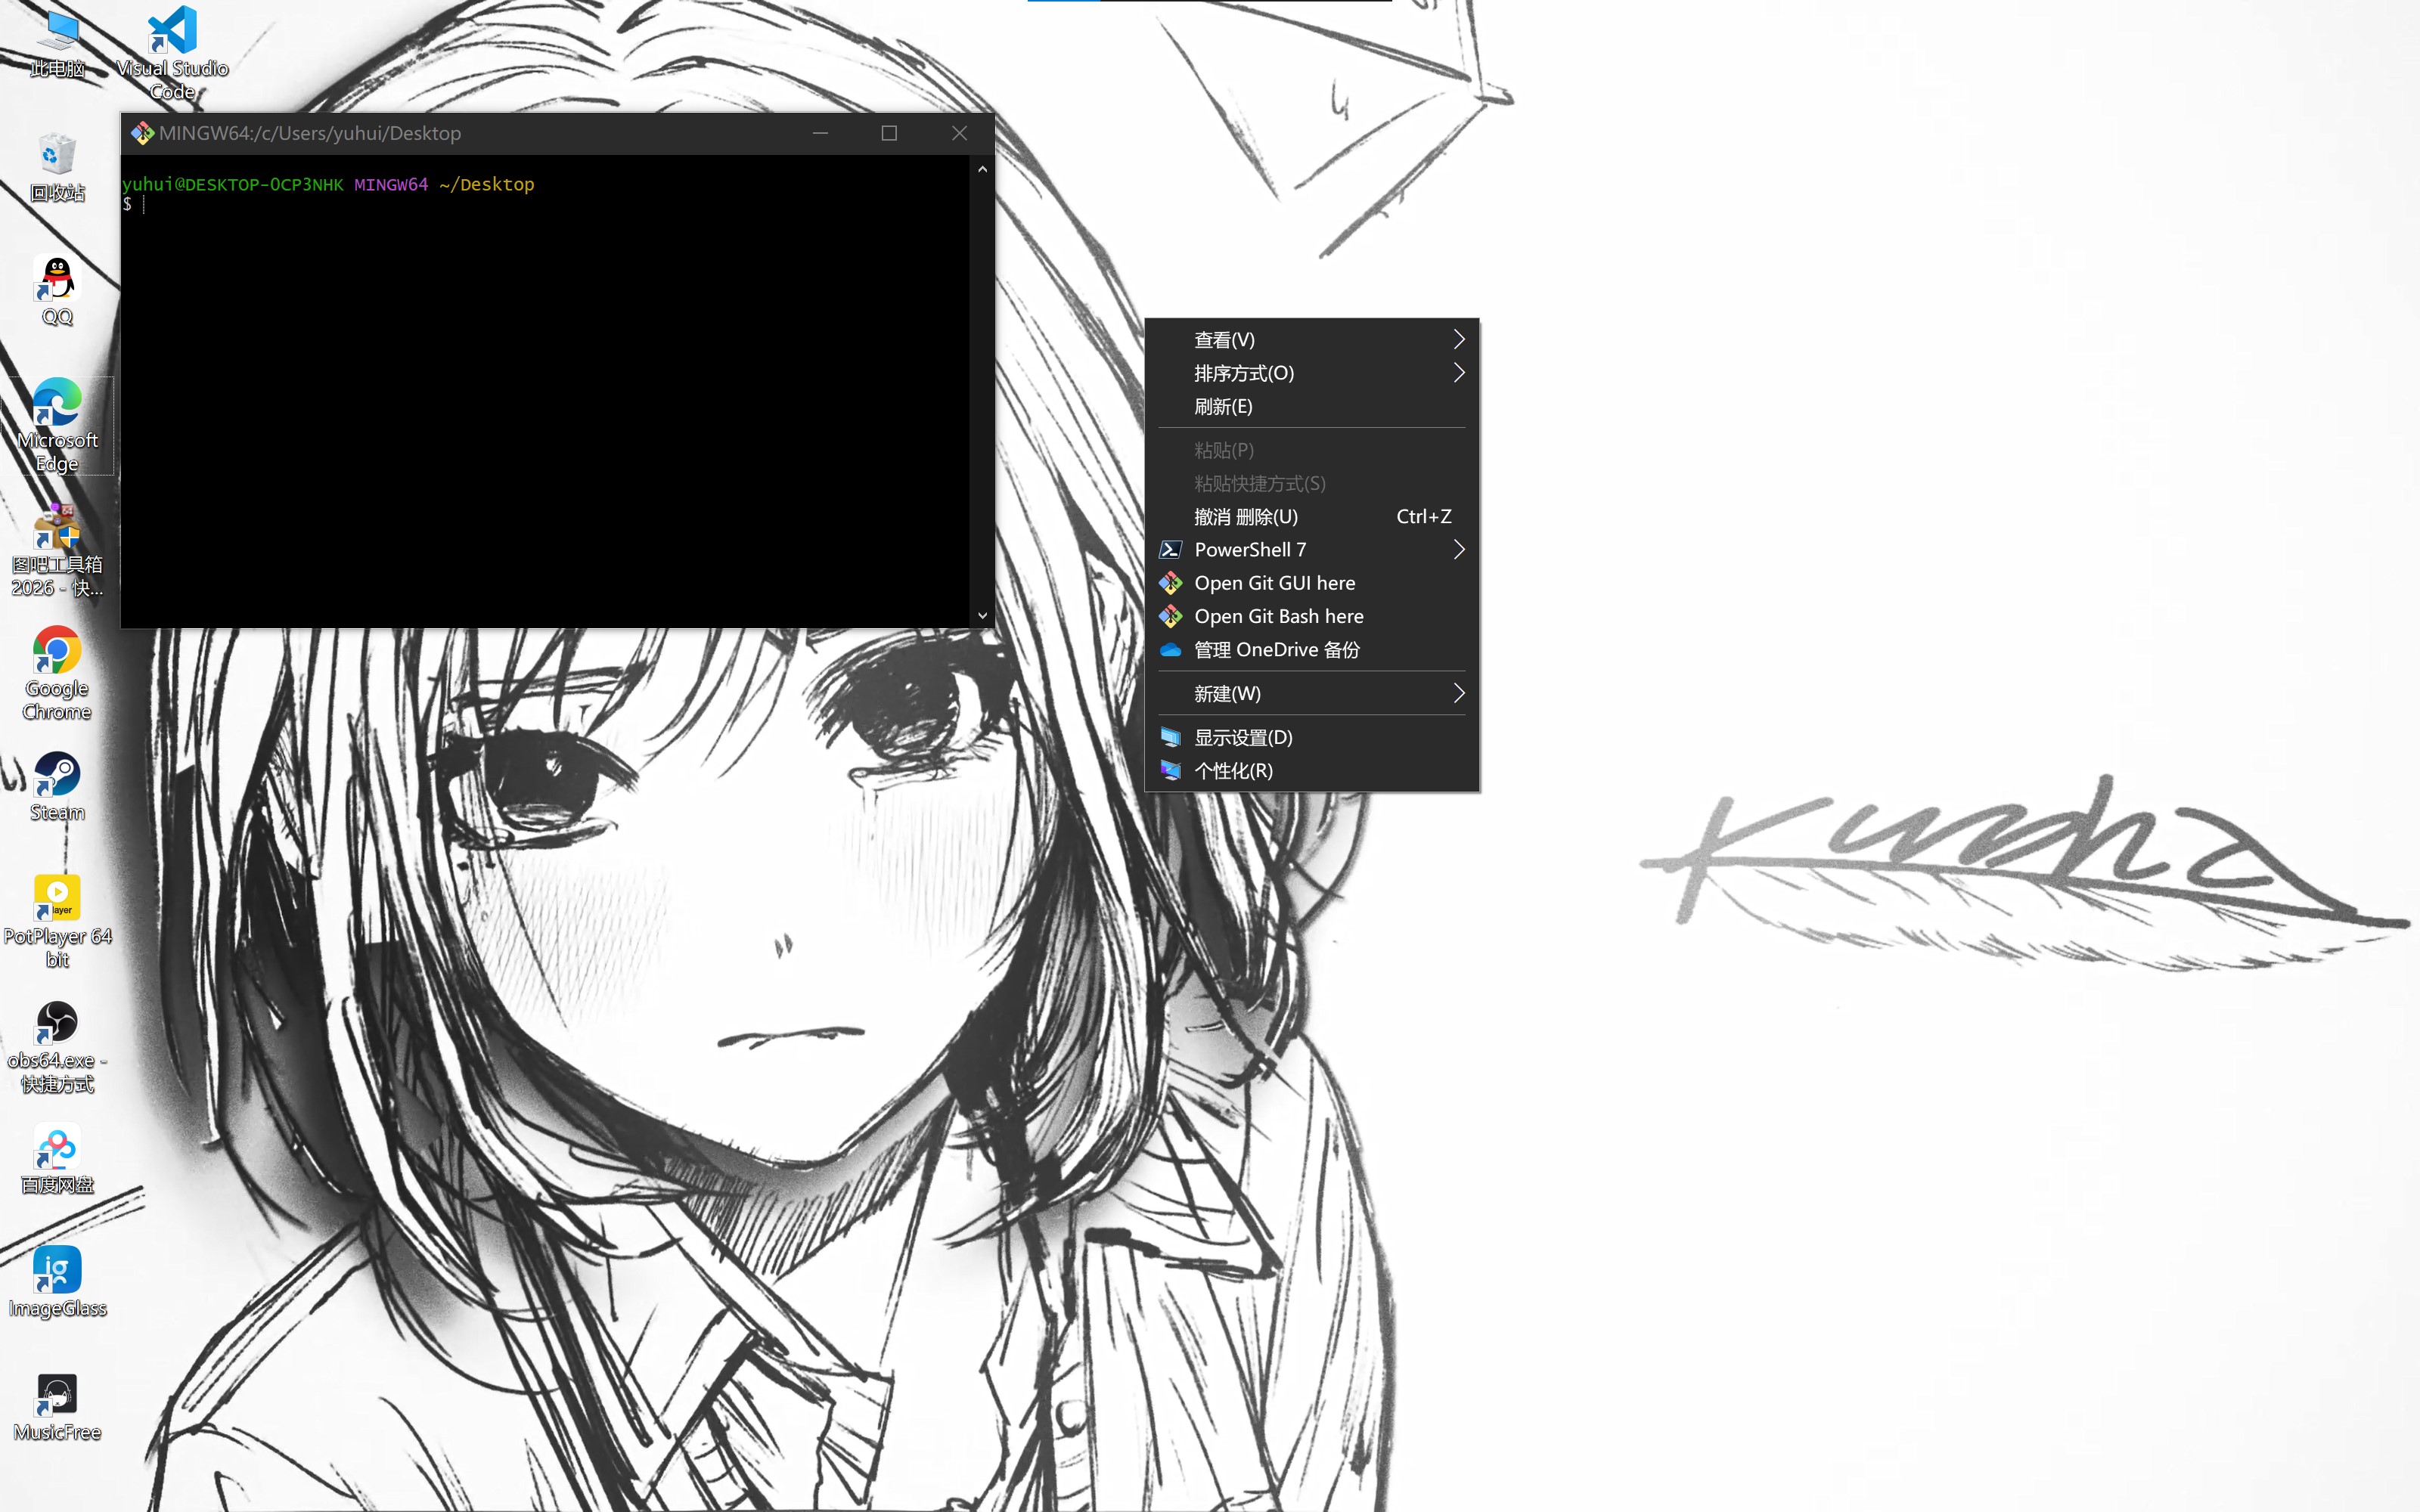
Search for “Git Bash” in the Start menu and open it, or right-click on the desktop and select “Open Git Bash Here”.
Run the following commands (replace your_email@example.com with your email address), press Enter when prompted:
|
|
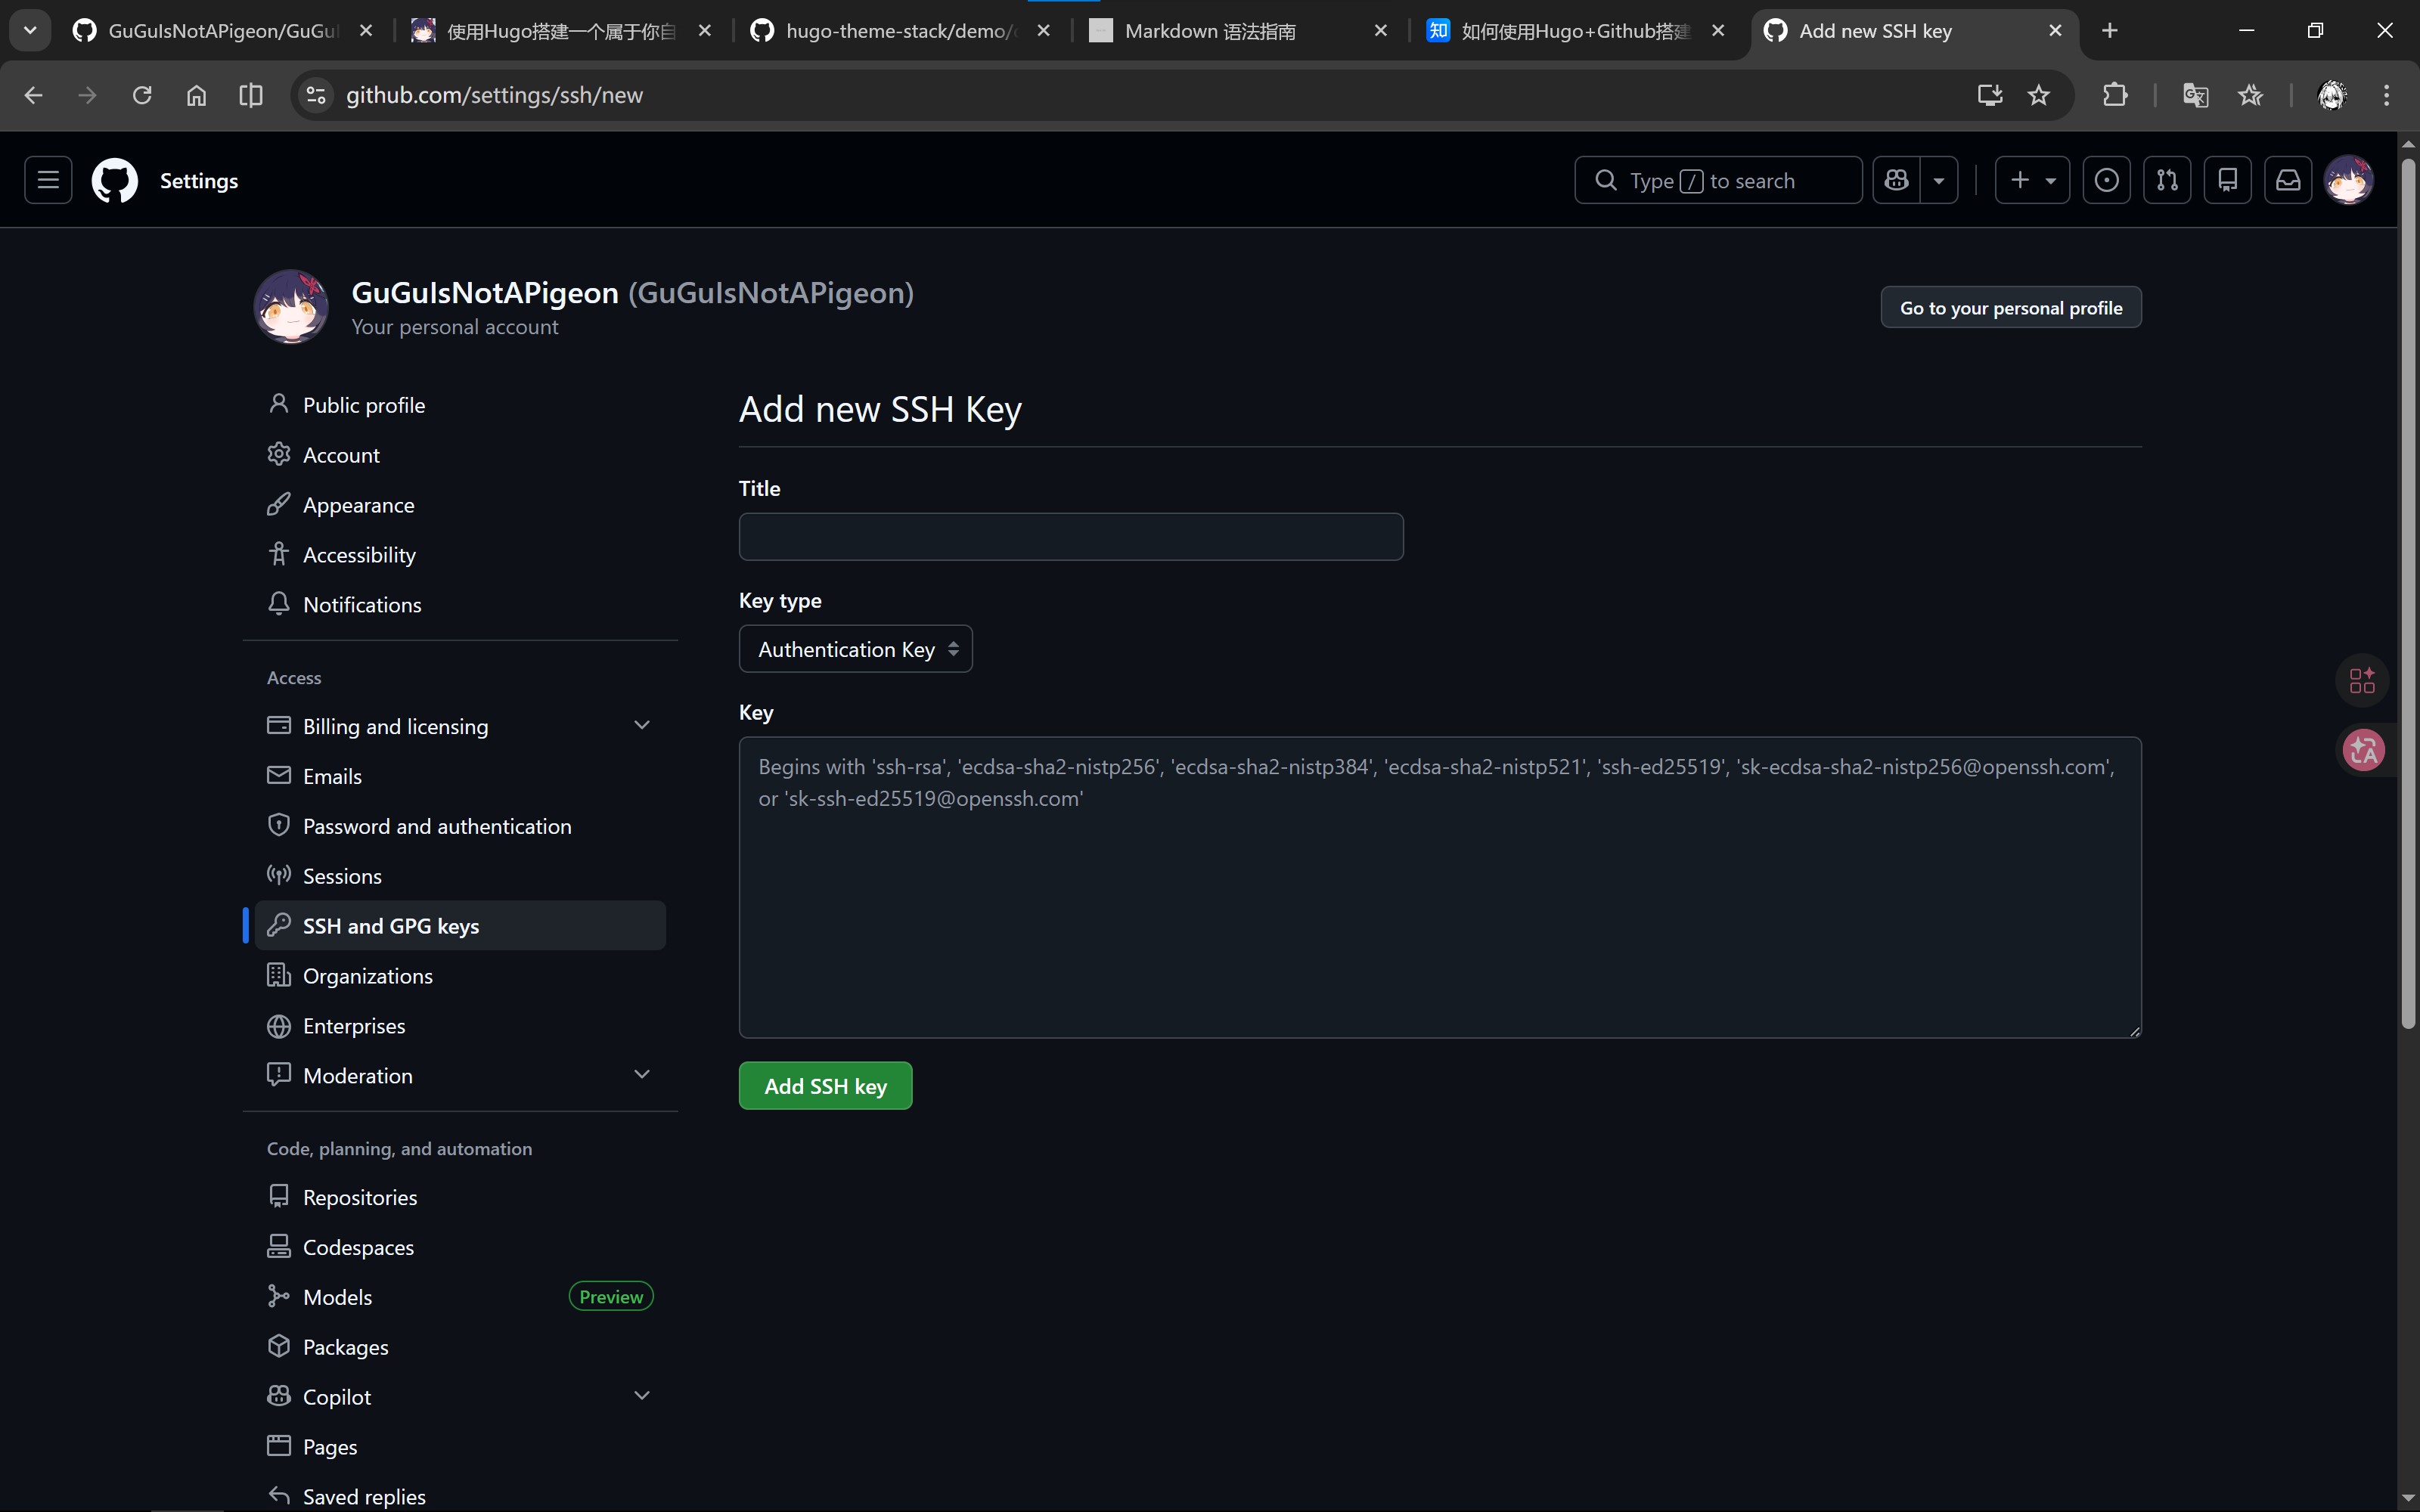
Copy the output from the second command, open the SSH key settings page, fill in a name in “Title” (e.g., “My Work Computer”), keep “Key type” as default, and paste the copied public key into the “Key” field.
ImportantMake sure there are no trailing spaces in the key!
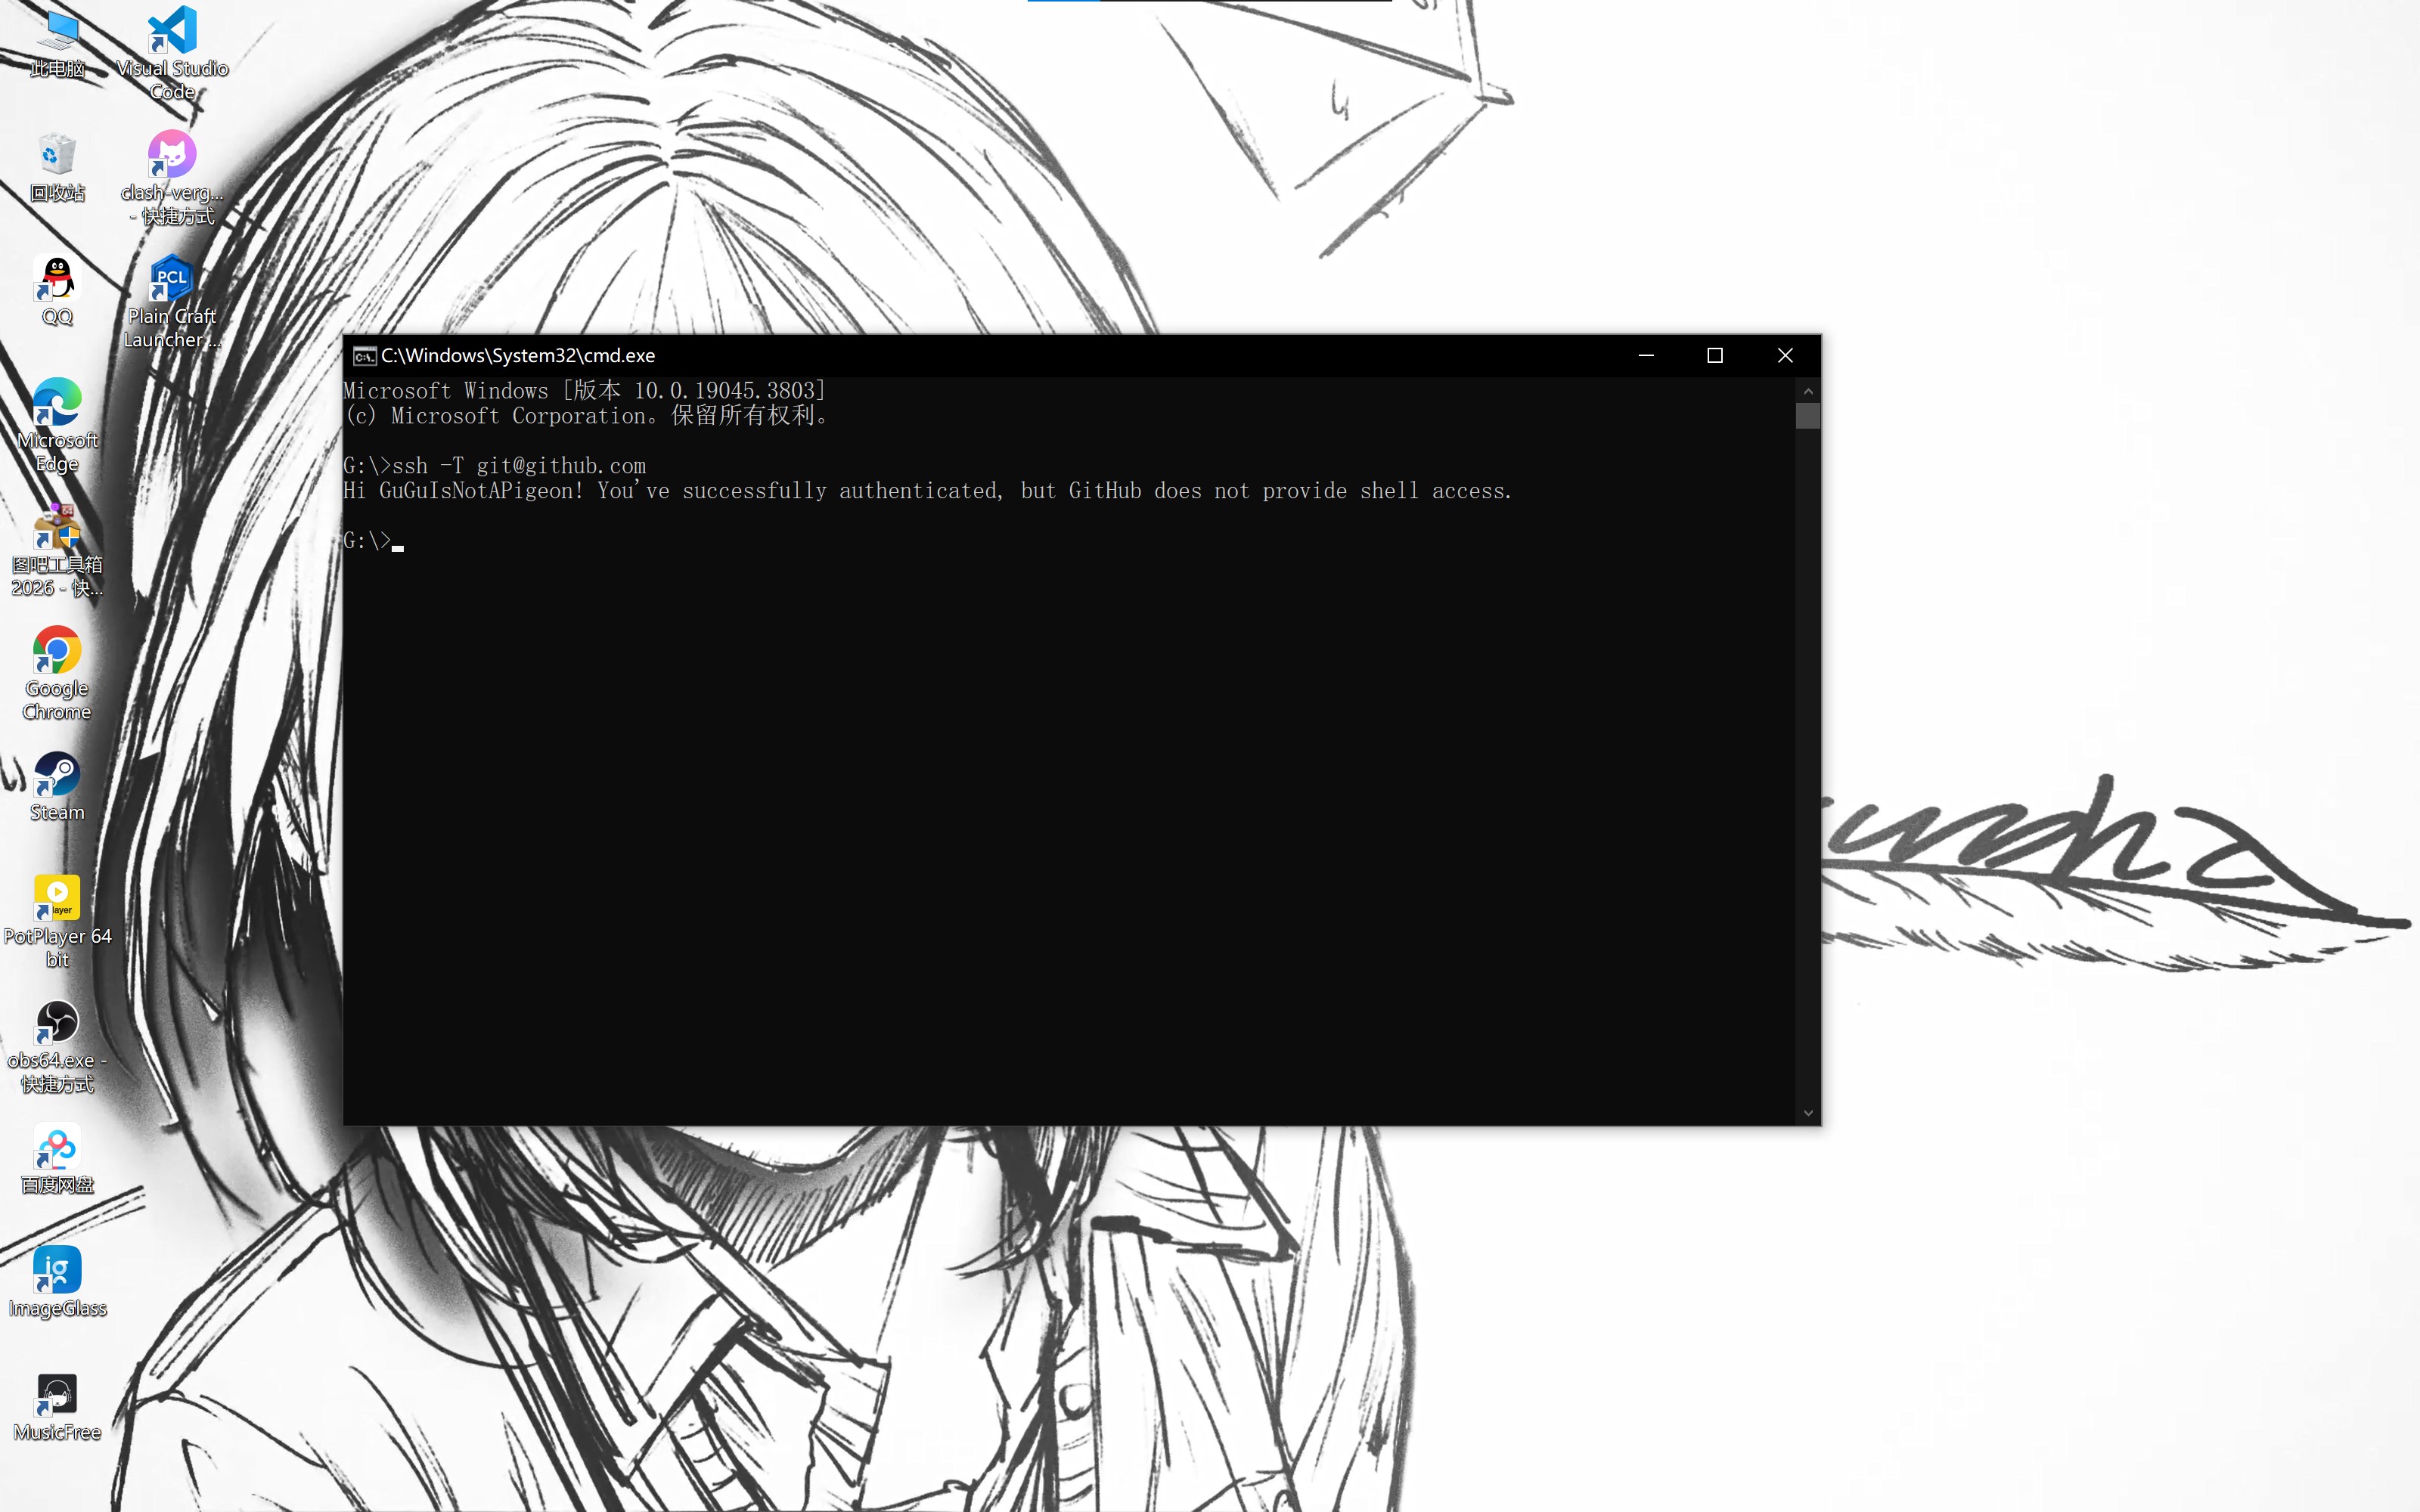
Finally, test SSH connectivity in the terminal. If you see xxx! You've successfully authenticated, but GitHub does not provide shell access., the connection is successful.
Install Hugo
Install Hugo on Windows
Using Microsoft’s Windows Package Manager winget
- Install Hugo Extended
|
|
- Uninstall Hugo Extended
|
|
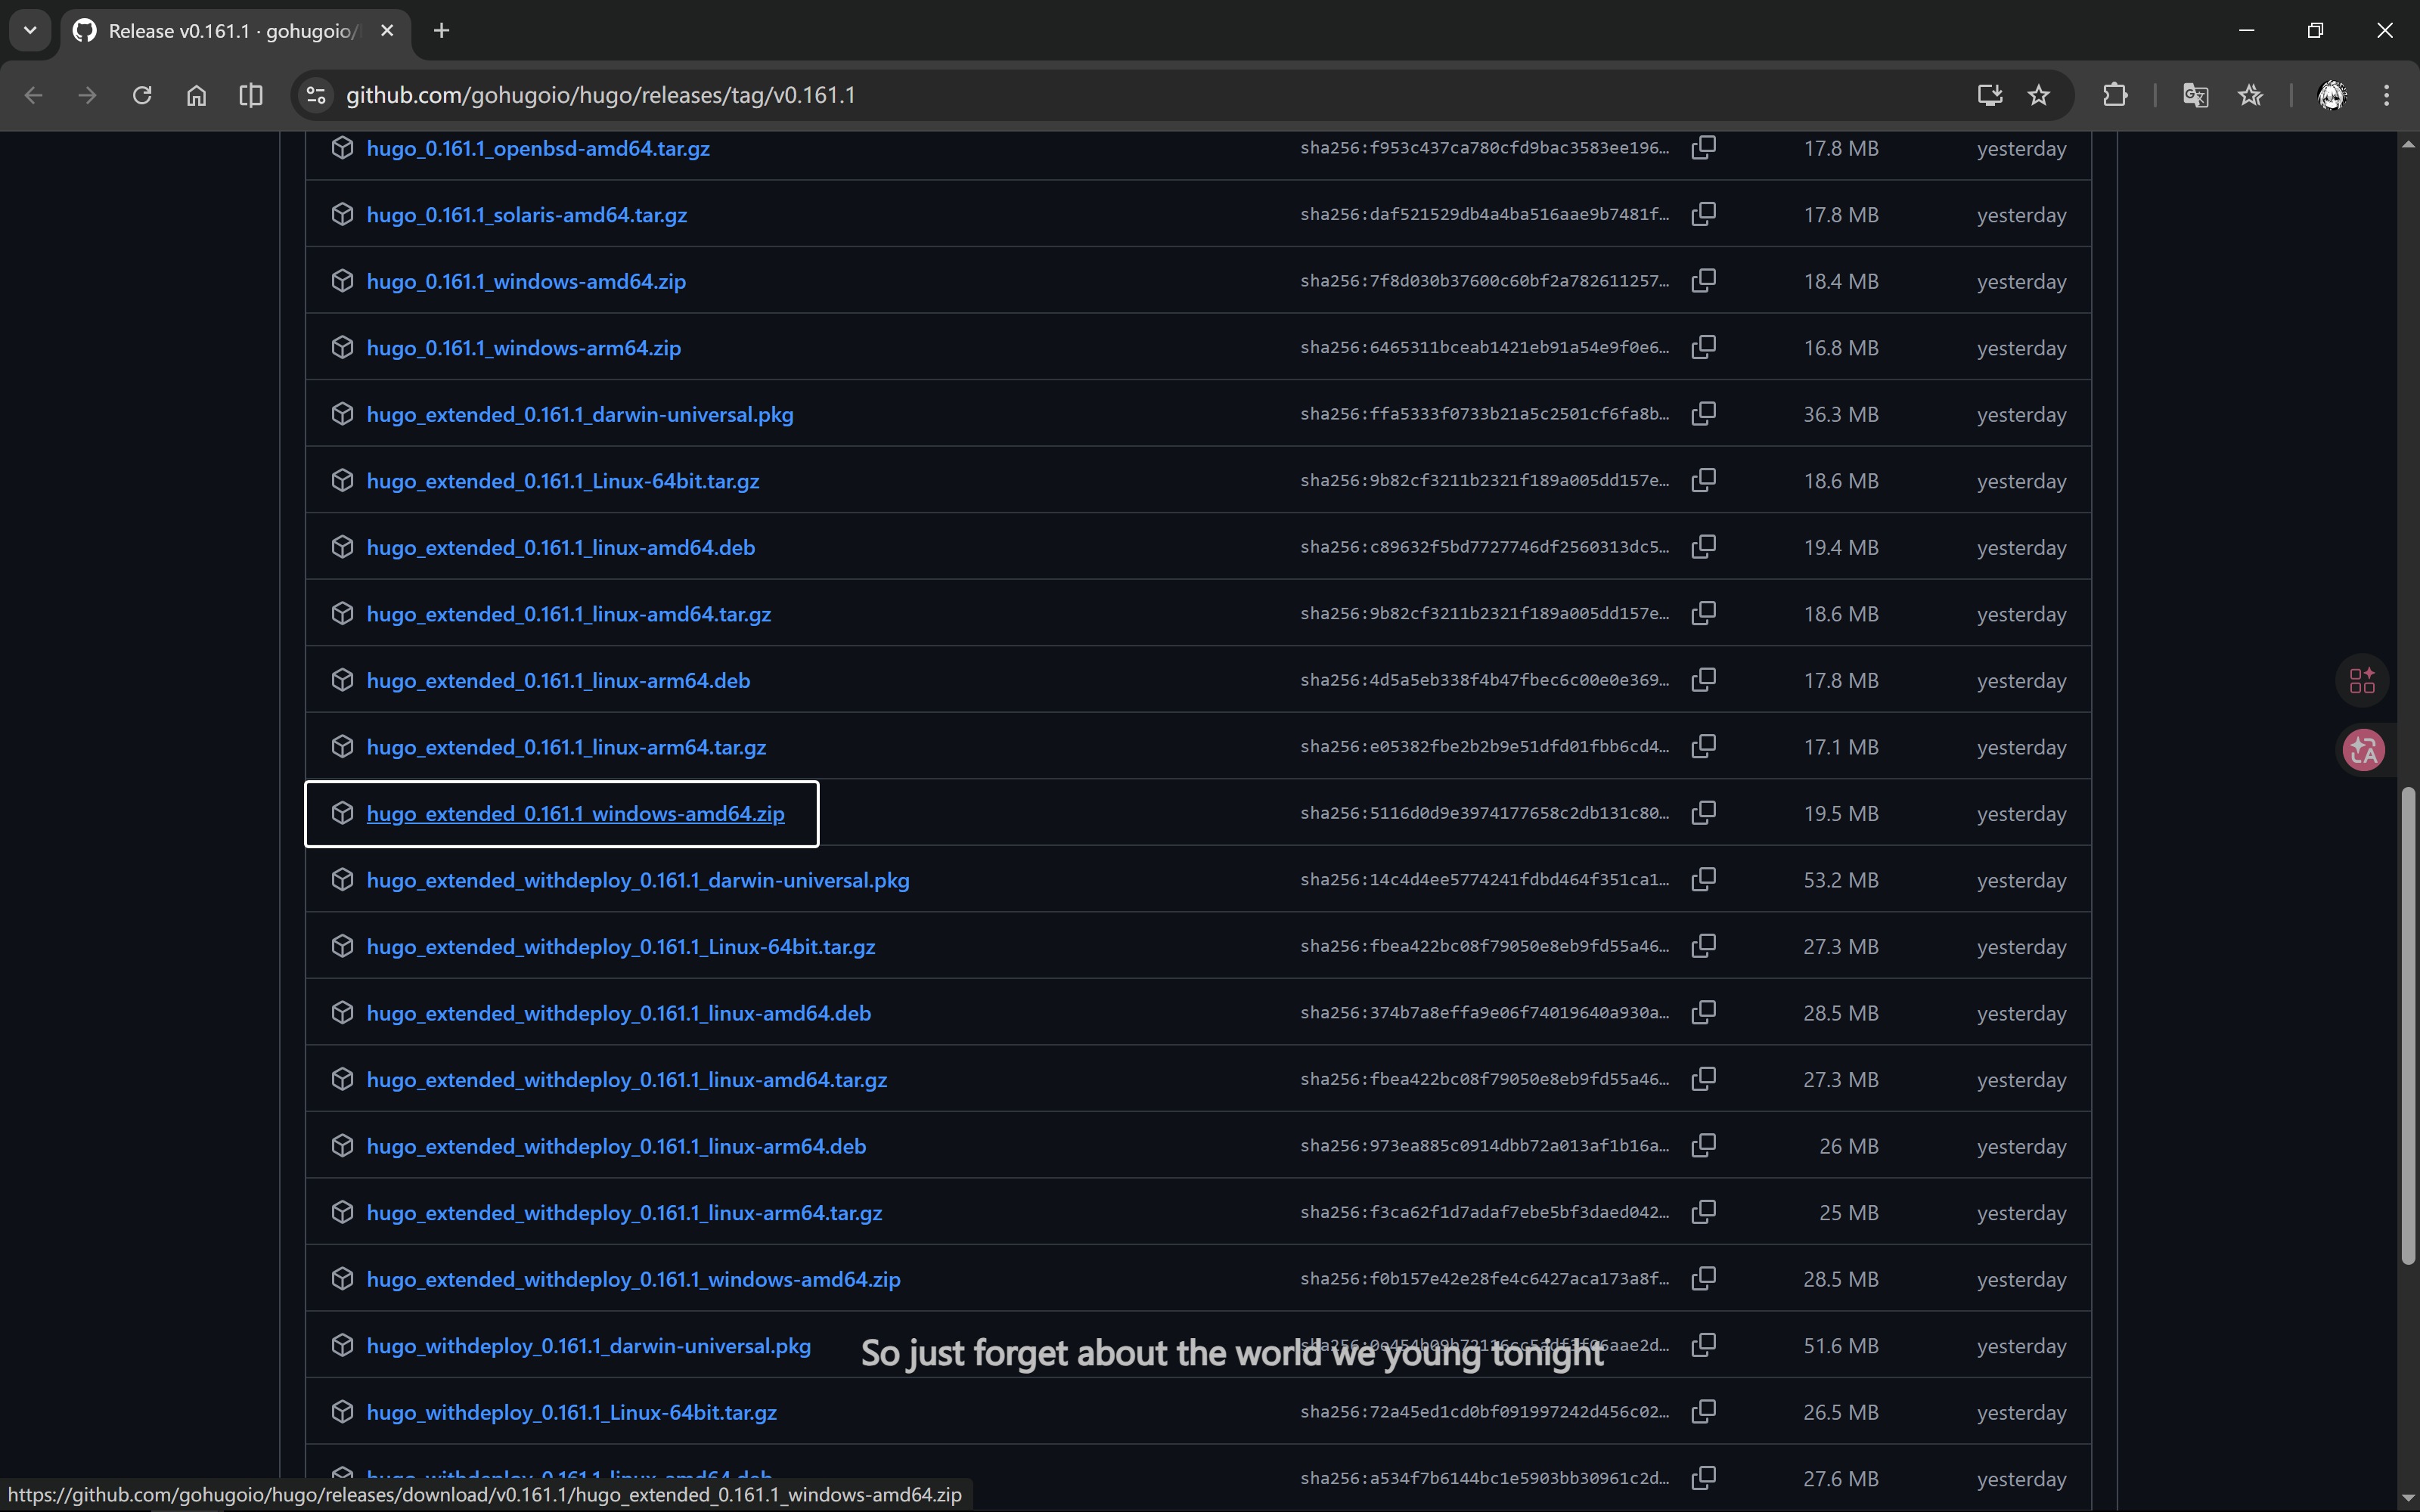
Using Pre-compiled Binaries from GitHub
Download hugo_extended_x.xxx.x_windows-amd64.zip from GitHub, extract it, and configure environment variables
Install Hugo on Linux
Using Package Managers
-
Ubuntu/Debian Systems
- Install Hugo Extended using apt
1 2sudo apt-get update sudo apt-get install hugo -
Fedora Systems
- Install using dnf
1sudo dnf install hugo -
Arch Linux Systems
- Install using pacman
1sudo pacman -S hugo
Using Pre-compiled Binaries
TipThis method can get the latest version of Hugo, especially the Extended version
-
Open the Hugo Releases page and download the file suitable for your system:
- 64-bit systems: download
hugo_extended_x.xxx.x_linux-amd64.tar.gz - 32-bit systems: download
hugo_extended_x.xxx.x_linux-386.tar.gz - ARM architecture: download the corresponding
hugo_extended_x.xxx.x_linux-arm64.tar.gz
- 64-bit systems: download
-
Open the terminal and navigate to the downloaded file’s directory:
|
|
- Extract the file:
|
|
- Move the Hugo executable to the system path:
|
|
- Verify the installation:
|
|
If the output is similar to hugo v0.160.1-d6bc8165e62b29d7d70ede01ed01d0f88de327e6+extended xxx/amd64 BuildDate=2026-04-08T14:02:42Z VendorInfo=gohugoio, the installation is successful.
Edit the Project
Enter the Project
- Create a new empty folder with an English name
- Open VS Code, click “Open Folder…”, and select the folder you just created

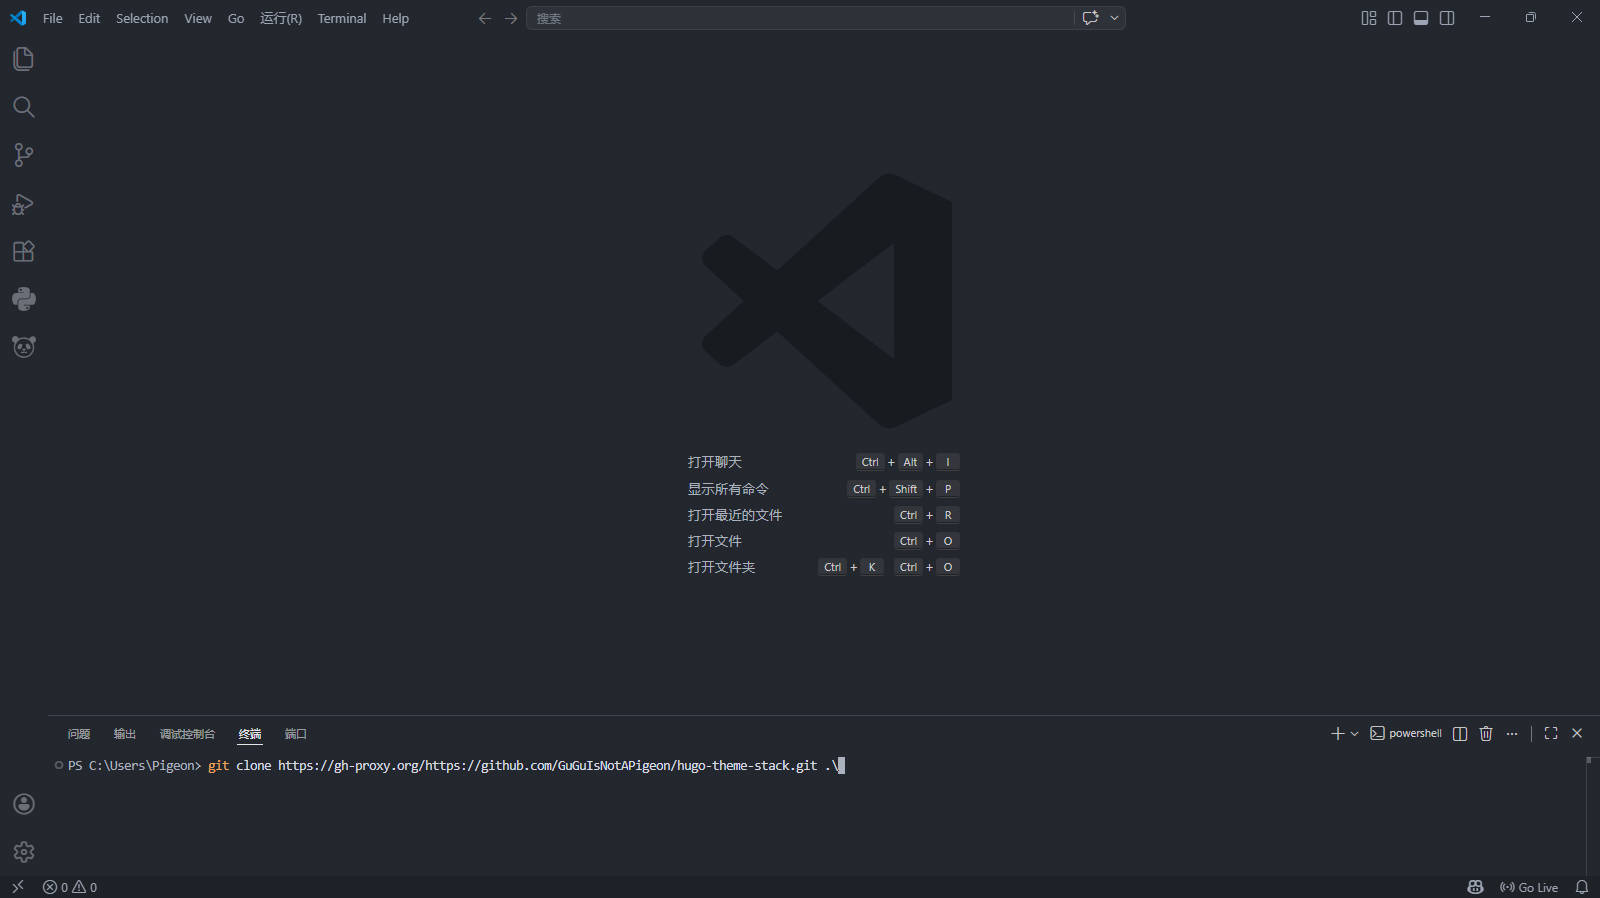
Press Ctrl + J to open the terminal, and clone my project1
TipChinese users should prioritize using the second command
Windows Users
|
|
Linux/macOS Users
|
|
Modify the Project
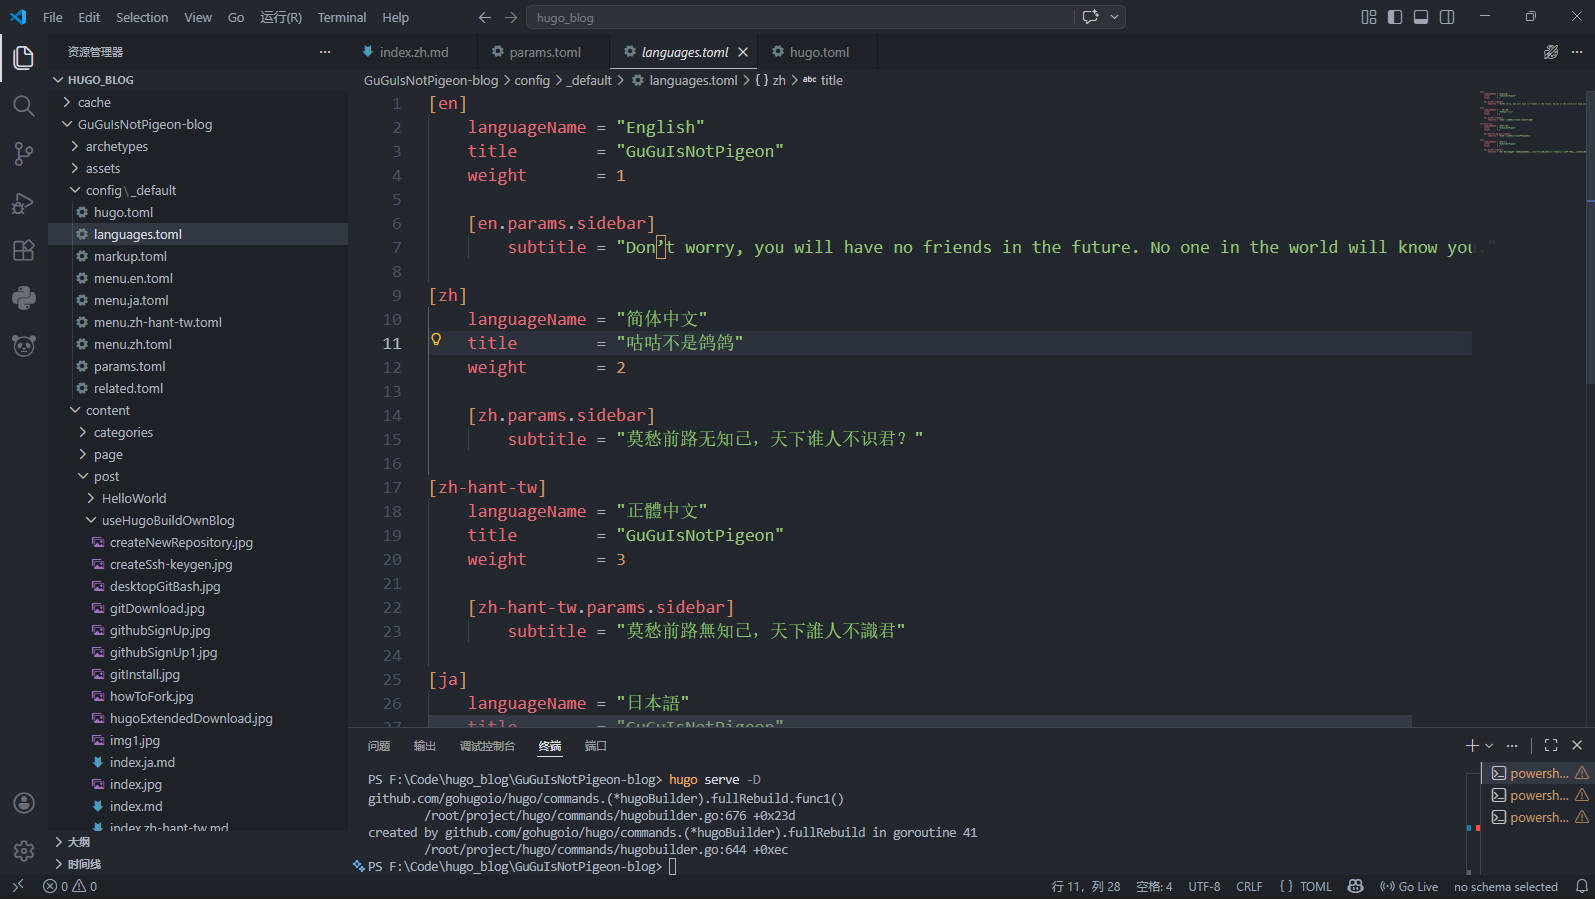
- In the Explorer on the left, open
config\_default\languages.toml, change the content aftertitleto your nickname, and fill in the subtitle aftersubtitle - Open
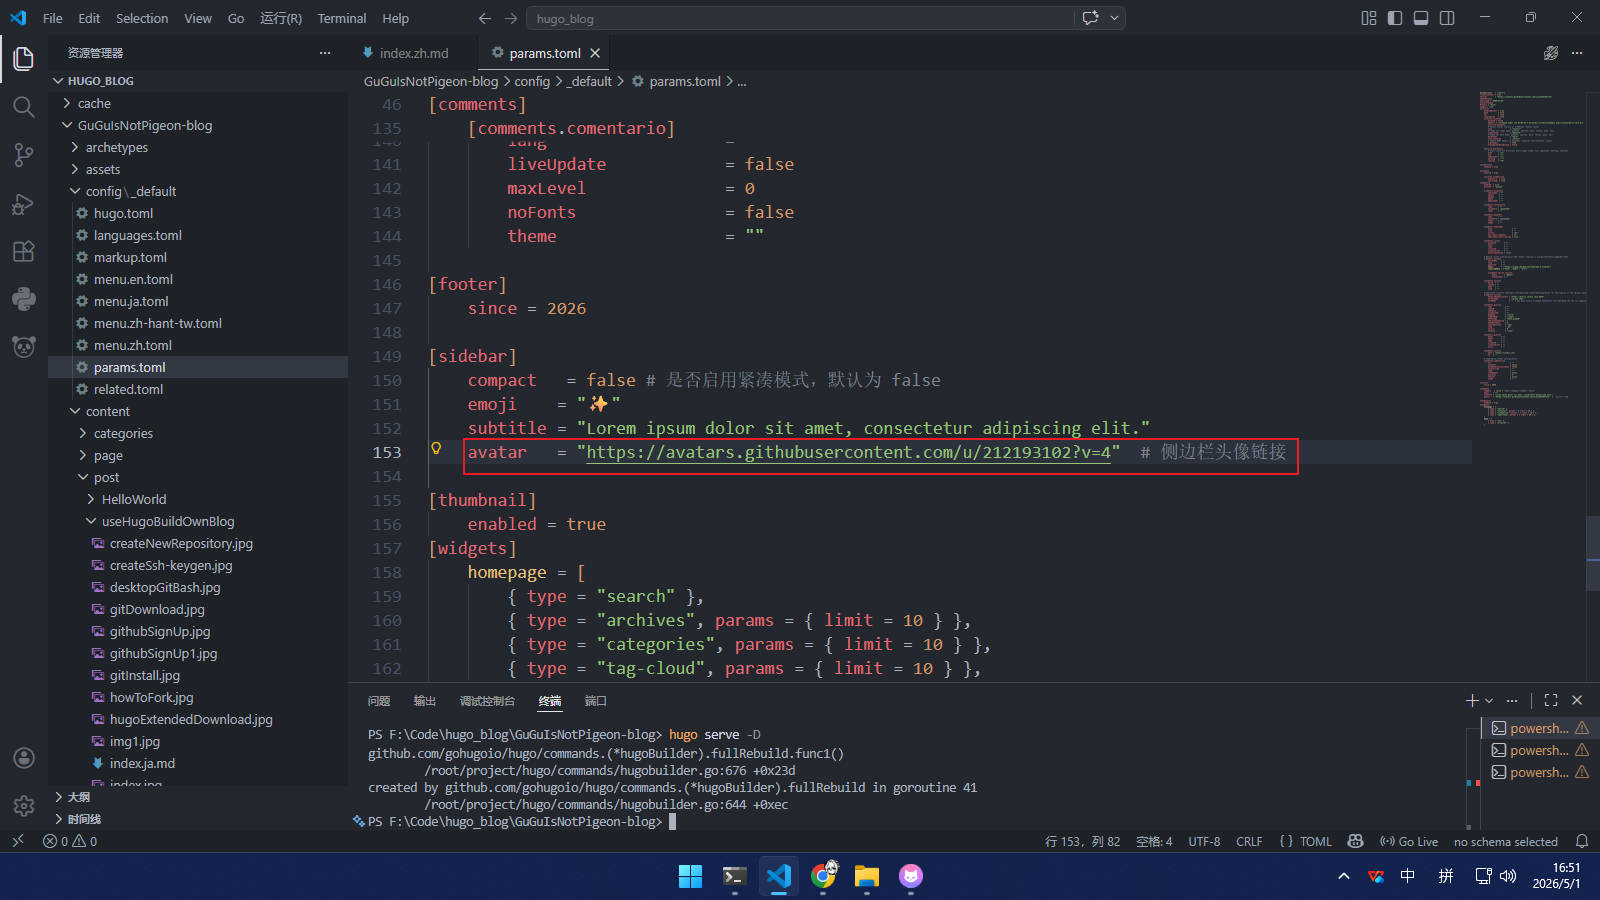
config\_default\params.toml, modify your avatar link under[sidebar]->avatar - Open
config\_default\hugo.toml, changebaseURL = "https://guguisnotapigeon.github.io/"tohttps://your-github-username.github.io
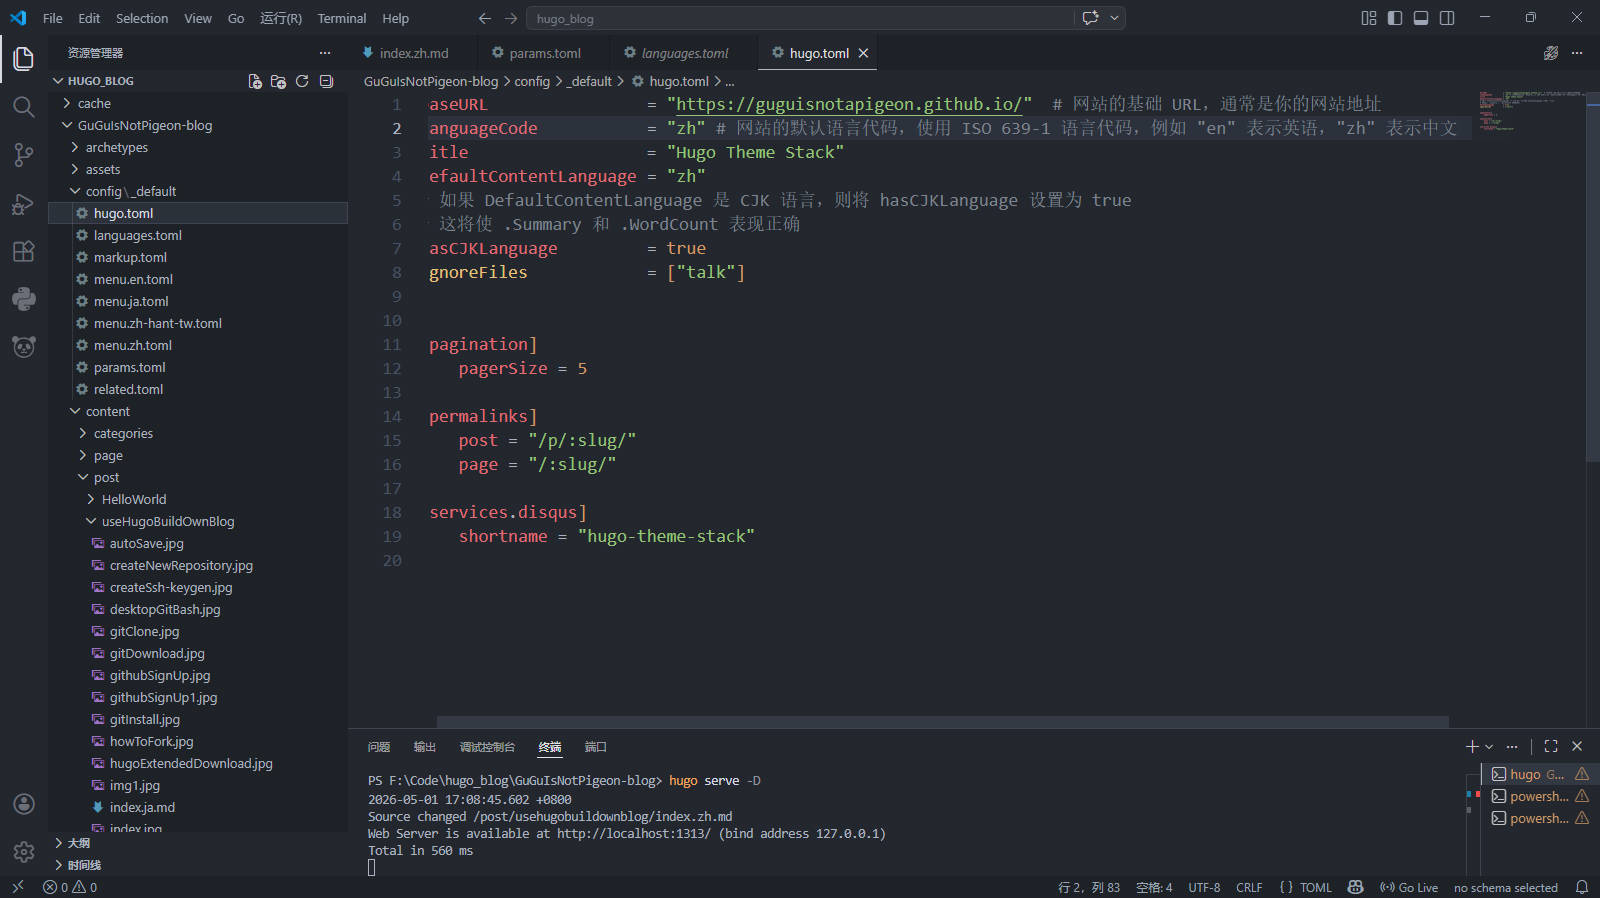
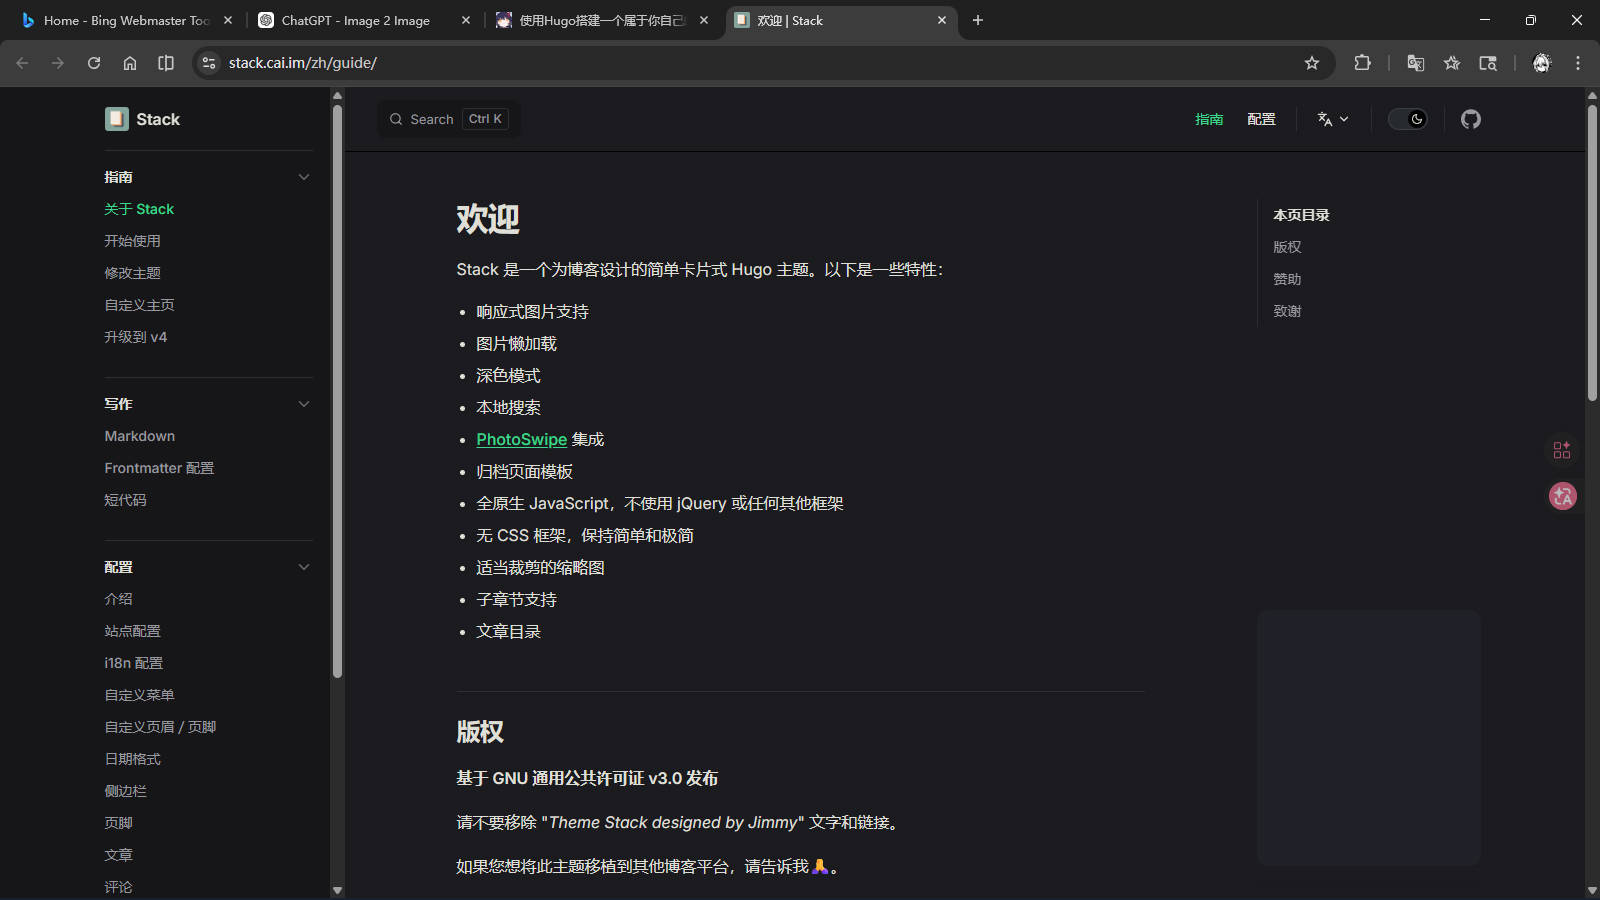
- For modifying other files, see the original author’s tutorial, and make adjustments based on your actual situation
TipWhether text or links, they must be modified within English double quotes
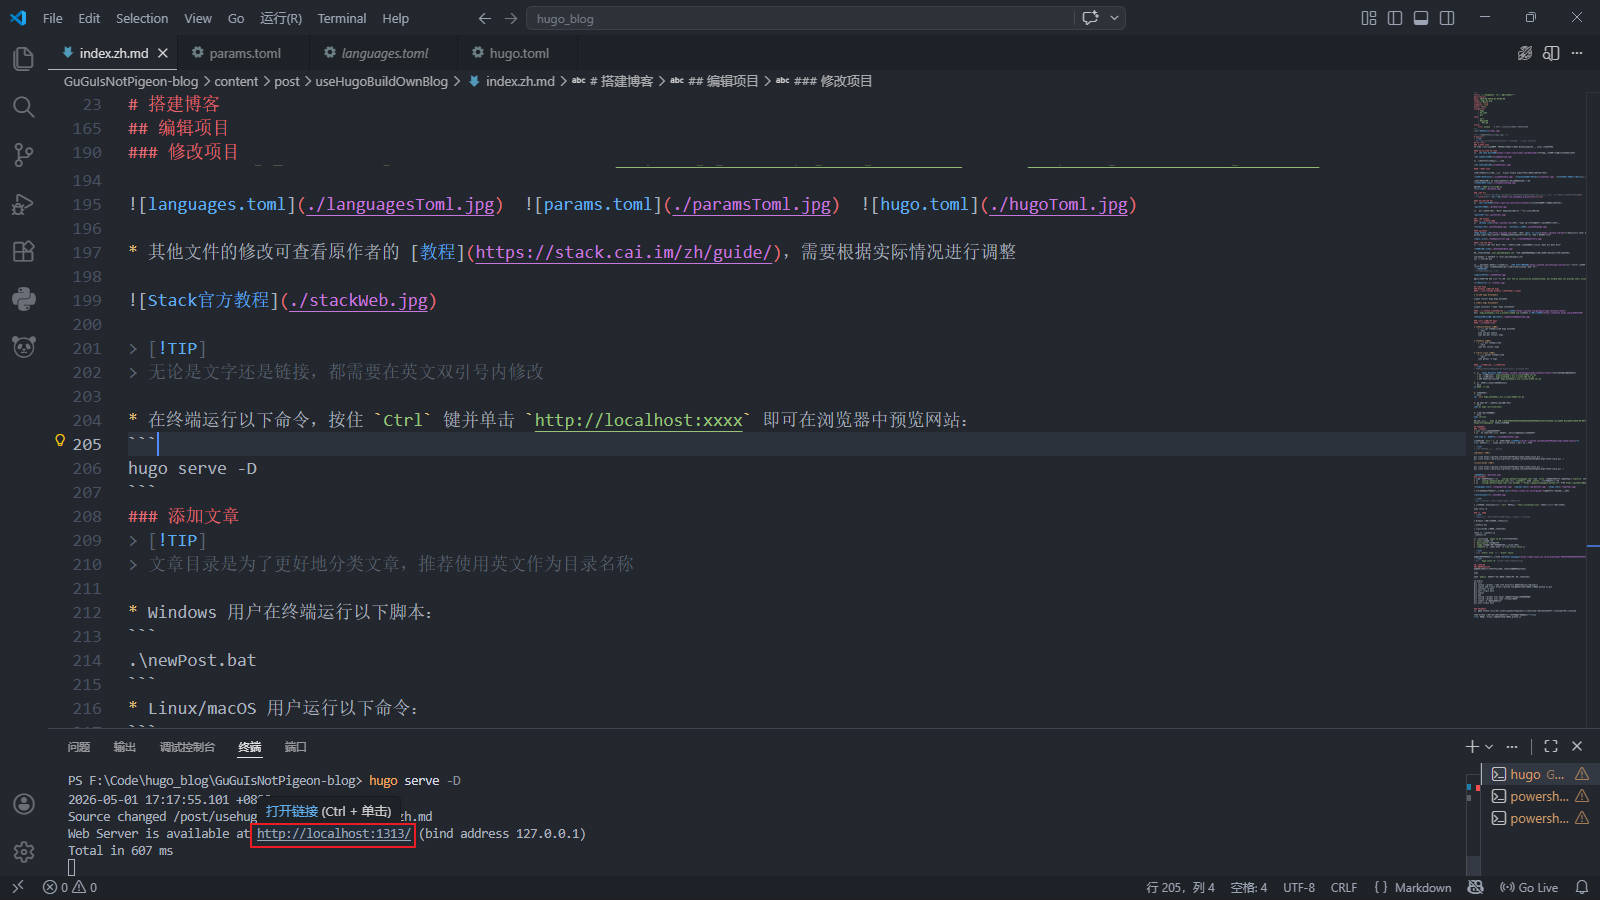
- Run the following command in the terminal, hold
Ctrland clickhttp://localhost:xxxxto preview the website in the browser:
|
|
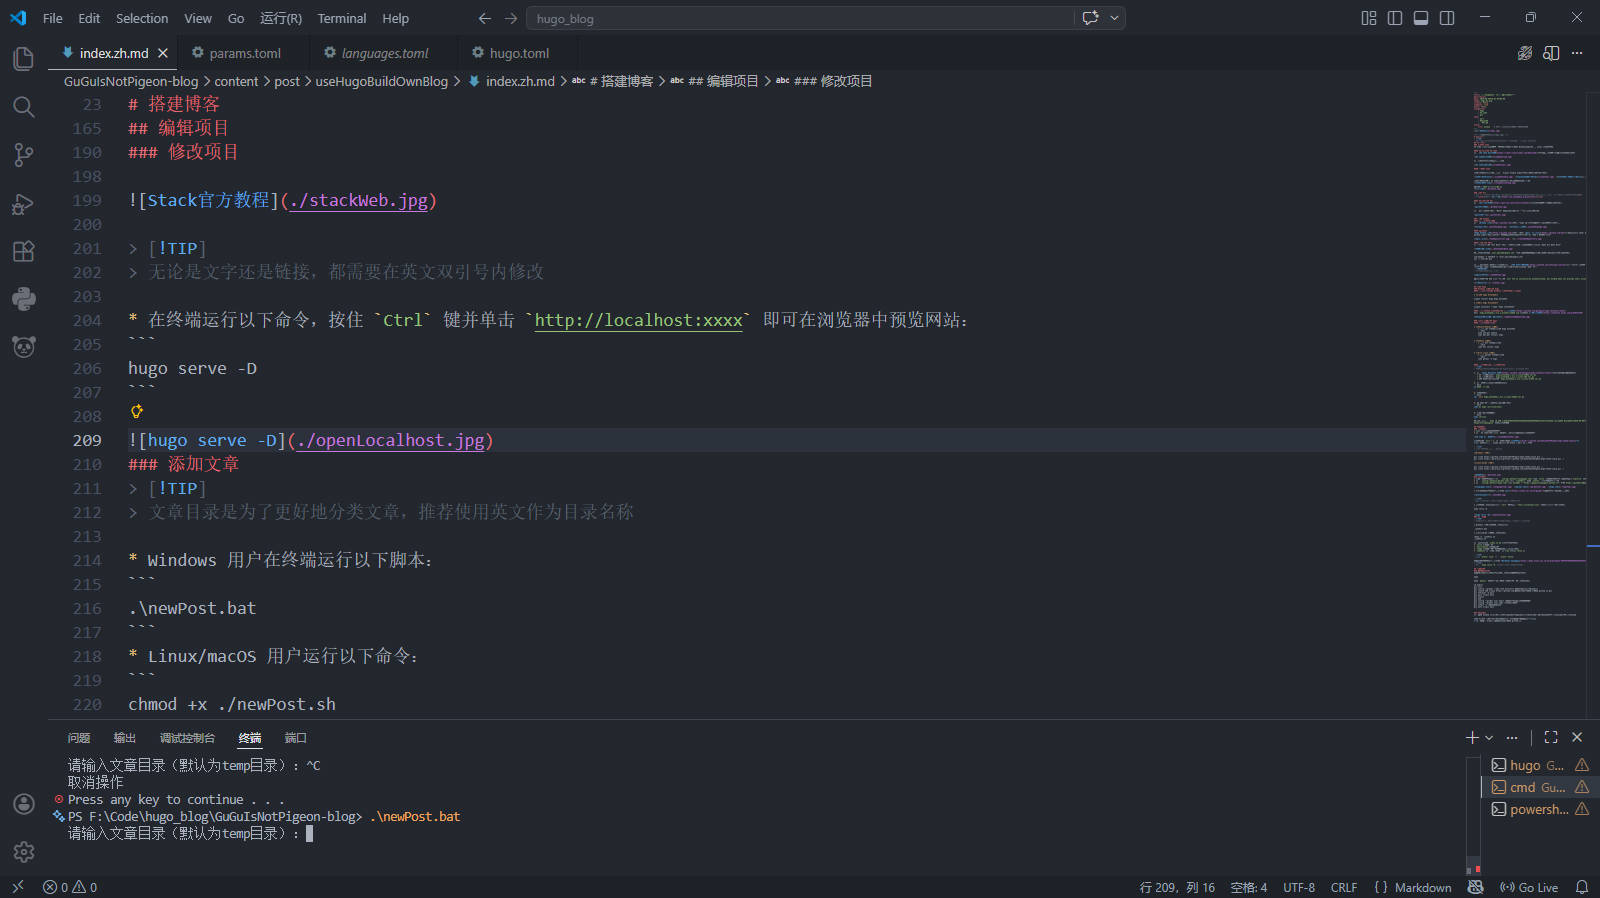
Add Articles
TipArticle directories are for better categorizing articles. It is recommended to use English as the directory name.
- Windows users run the following script in the terminal:
|
|
- Linux/macOS users run the following command:
|
|
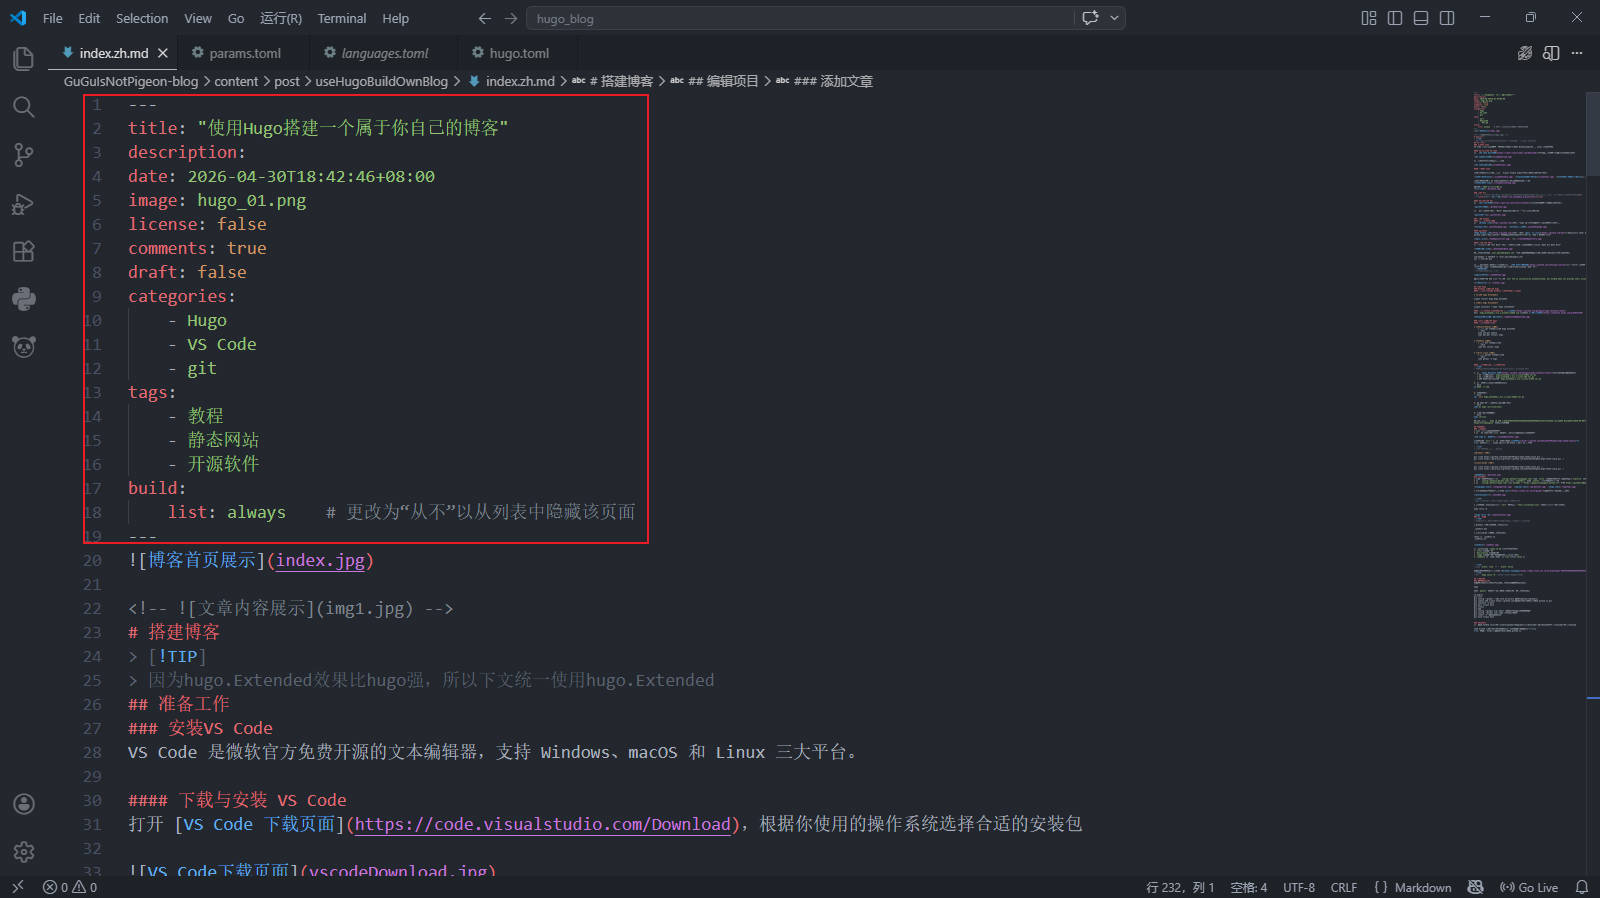
Open index.md in the corresponding directory and modify the following:
title: Article titledescription: Article descriptionimage: Article cover image path (can use relative path)comments: Toggle comment section (on:true, off:false)
TipPlease change
draft: truetodraft: false
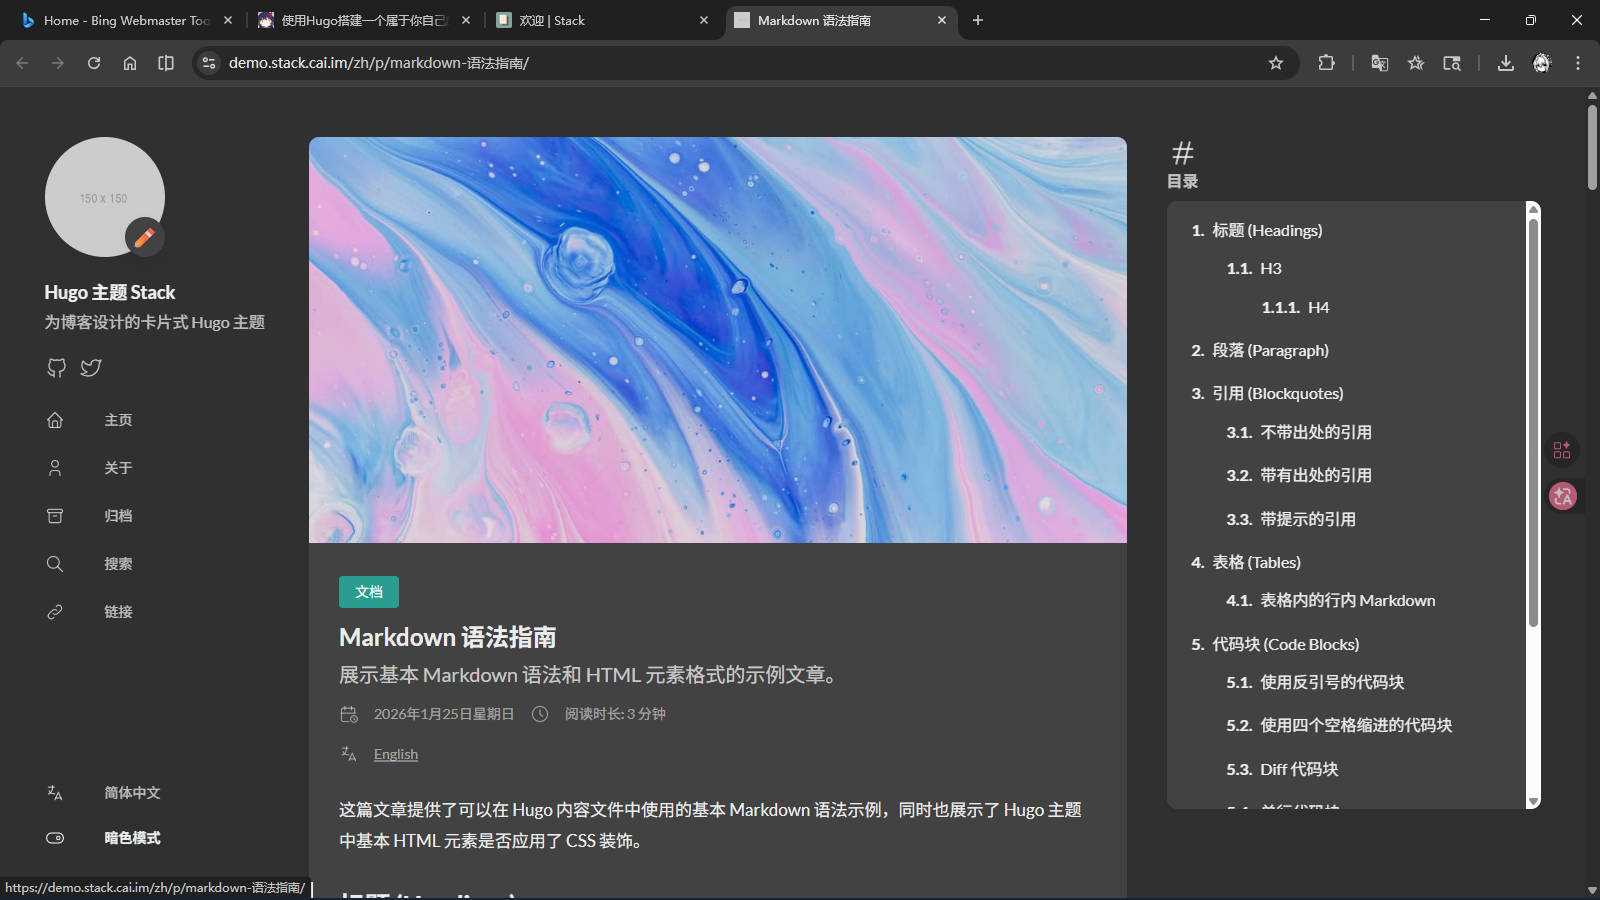
For article content writing, see the original author’s Markdown syntax guide
TipRunning
hugo serve -Dallows you to view article modifications in real-time
Deploy the Website
Generate Static Pages
After writing the article, run the following command in the project root to generate static pages:
|
|
Many files will appear in the public folder.
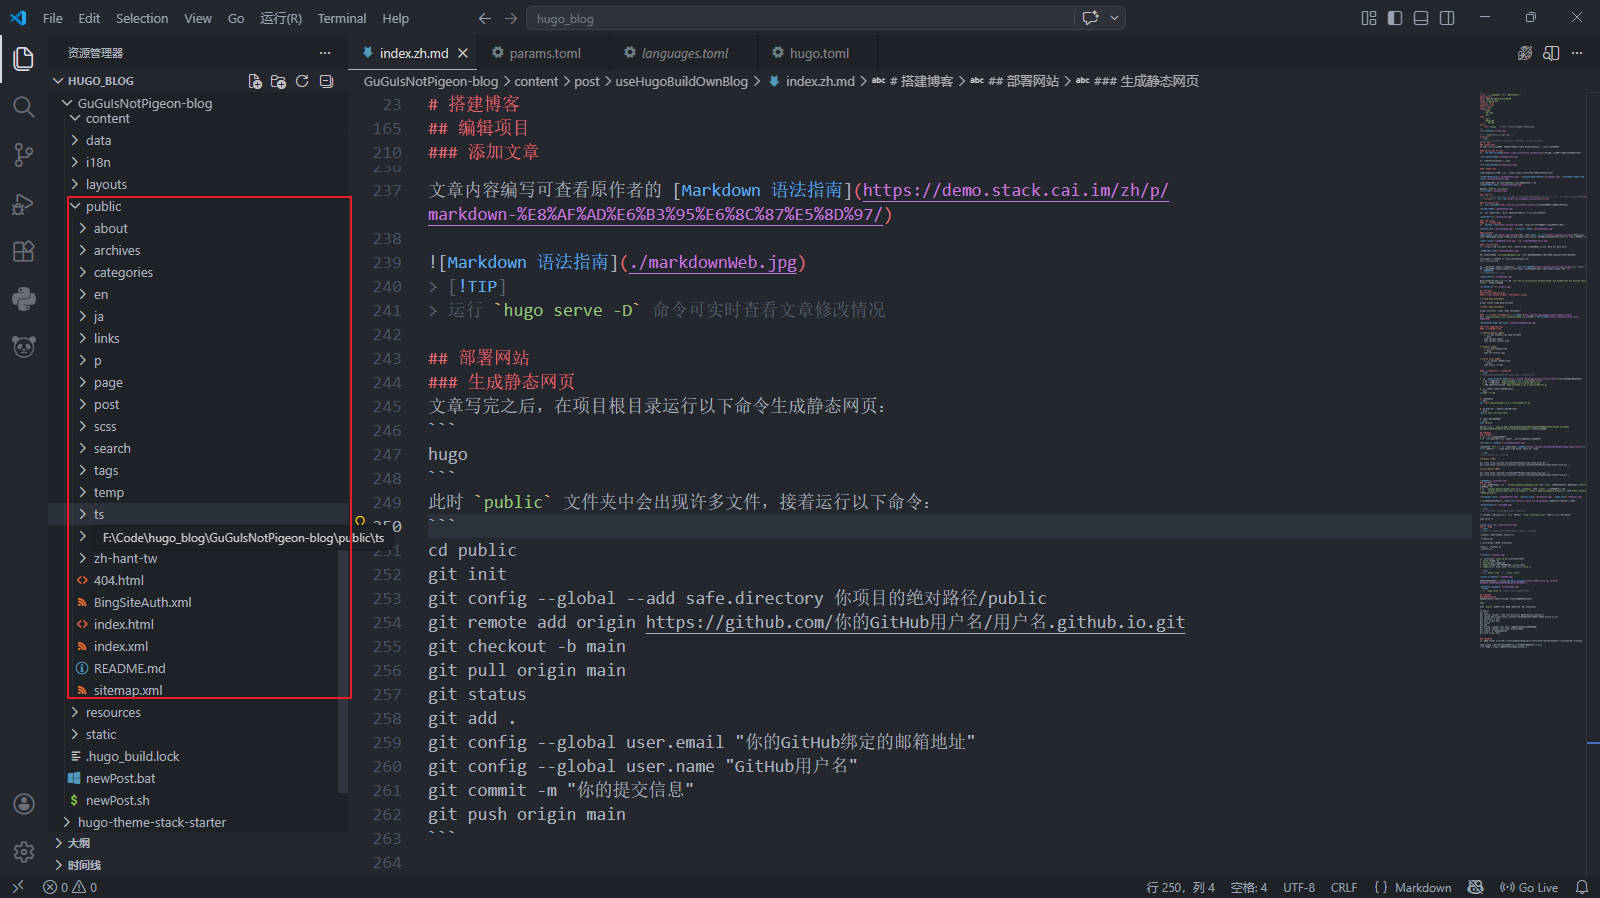
Then run the following commands:
|
|
Push the Project
Open your GitHub repository, click “Settings” → “Pages”, change “Branch” from “None” to “main”, and click “Save”
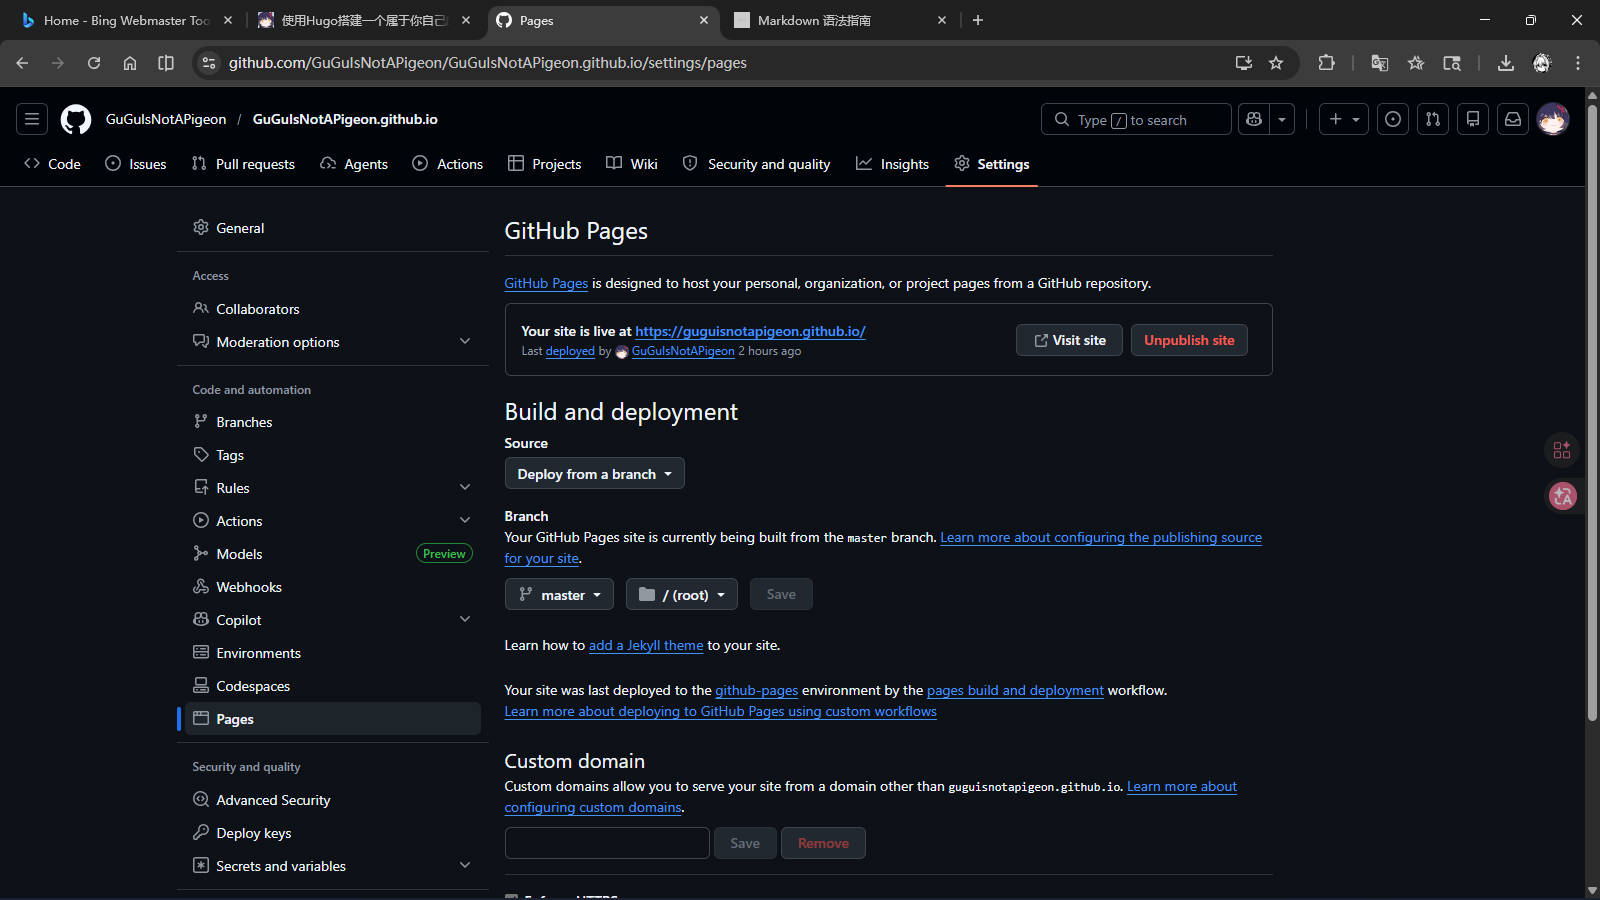
Wait for GitHub to finish deploying. After that, you can access your blog at the following address2
Quick NoteFor subsequent pushes, you can run
gitPush.bat
Run the installer and follow the installation prompts.
Configure VS Code
After installation, open Visual Studio Code from the desktop and search for and install the following plugins:
Restart VS Code after installation, and the entire software interface will be in Chinese.
Install Git
Git is a distributed version control system that can manage source code or data versions. It is commonly used by software developers for source code control in collaborative development
— Excerpt from Wikipedia
Download and Install Git
Open the Git download page and download the appropriate installer for your operating system.
Run the Git installer, click “Next” to reach the following screen, check the options as shown and complete the installation.
Configure GitHub
Register a GitHub Account
Open GitHub’s homepage, click “Sign up”, fill in your information to complete registration.
Create a New Repository
Go to GitHub’s homepage, click “New” to create a new repository, fill in “Repository name” with “your-github-username.github.io”, fill in “Description” with a description for your project, and check “Add a README file”.
Configure SSH Key
Search for “Git Bash” in the Start menu and open it, or right-click on the desktop and select “Open Git Bash Here”.
Run the following commands (replace your_email@example.com with your email address), press Enter when prompted:
|
|
Copy the output from the second command, open the SSH key settings page, fill in a name in “Title” (e.g., “My Work Computer”), keep “Key type” as default, and paste the copied public key into the “Key” field.
ImportantMake sure there are no trailing spaces in the key!
Finally, test SSH connectivity in the terminal. If you see xxx! You've successfully authenticated, but GitHub does not provide shell access., the connection is successful.
Install Hugo
Install Hugo on Windows
Using Microsoft’s Windows Package Manager winget
- Install Hugo Extended
|
|
- Uninstall Hugo Extended
|
|
Using Pre-compiled Binaries from GitHub
Download hugo_extended_x.xxx.x_windows-amd64.zip from GitHub, extract it, and configure environment variables
Install Hugo on Linux
Using Package Managers
-
Ubuntu/Debian Systems
- Install Hugo Extended using apt
1
2
sudo apt-get update sudo apt-get install hugo -
Fedora Systems
- Install using dnf
1sudo dnf install hugo -
Arch Linux Systems
- Install using pacman
1sudo pacman -S hugo
Using Pre-compiled Binaries
TipThis method can get the latest version of Hugo, especially the Extended version
-
Open the Hugo Releases page and download the file suitable for your system:
- 64-bit systems: download
hugo_extended_x.xxx.x_linux-amd64.tar.gz - 32-bit systems: download
hugo_extended_x.xxx.x_linux-386.tar.gz - ARM architecture: download the corresponding
hugo_extended_x.xxx.x_linux-arm64.tar.gz
- 64-bit systems: download
-
Open the terminal and navigate to the downloaded file’s directory:
|
|
- Extract the file:
|
|
- Move the Hugo executable to the system path:
|
|
- Verify the installation:
|
|
If the output is similar to hugo v0.160.1-d6bc8165e62b29d7d70ede01ed01d0f88de327e6+extended xxx/amd64 BuildDate=2026-04-08T14:02:42Z VendorInfo=gohugoio, the installation is successful.
Edit the Project
Enter the Project
- Create a new empty folder with an English name
- Open VS Code, click “Open Folder…”, and select the folder you just created
Press Ctrl + J to open the terminal, and clone my project1
TipChinese users should prioritize using the second command
Windows Users
|
|
Linux/macOS Users
|
|
Modify the Project
- In the Explorer on the left, open
config\_default\languages.toml, change the content aftertitleto your nickname, and fill in the subtitle aftersubtitle - Open
config\_default\params.toml, modify your avatar link under[sidebar]->avatar - For modifying other files, see the original author’s tutorial, and make adjustments based on your actual situation
TipWhether text or links, they must be modified within English double quotes
- Run the following command in the terminal, hold
Ctrland clickhttp://localhost:xxxxto preview the website in the browser:
|
|
Add Articles
TipArticle directories are for better categorizing articles. It is recommended to use English as the directory name.
- Windows users run the following script in the terminal:
|
|
- Linux/macOS users run the following command:
|
|
Open index.md in the corresponding directory and modify the following:
title: Article titledescription: Article descriptionimage: Article cover image path (can use relative path)comments: Toggle comment section (on:true, off:false)
TipPlease change
draft: truetodraft: false
For article content writing, see the original author’s Markdown syntax guide
TipRunning
hugo serve -Dallows you to view article modifications in real-time
Deploy the Website
Generate Static Pages
After writing the article, run the following command in the project root to generate static pages:
|
|
Many files will appear in the public folder. Then run the following commands:
|
|
Push the Project
Open your GitHub repository, click “Settings” → “Pages”, change “Branch” from “None” to “main”, and click “Save”
Wait for GitHub to finish deploying. After that, you can access your blog at the following address2:
-
This project is based on Jimmy’s Stack theme, modified by AI. ↩︎ ↩︎
-
Address is https://your-github-username.github.io ↩︎ ↩︎
Comments are disabled until you accept functional cookies.